• Skip to primary navigation
  • Skip to main content
  • Skip to primary sidebar

Galaxy S9 Guides

a community for owners of Samsung Galaxy S9 and S9+

  • Home
    • About Galaxy S9 Guides
    • Contact Us
  • How-to Guides
    • Galaxy S9 Android Pie update guides
      • Official user manuals for Galaxy S9 and S9 Plus with Android Pie update
      • Top 9 new features of Android Pie update for Galaxy S9 and S9+
      • How to use the new navigation gestures in Android Pie update for Galaxy S9 and S9+?
      • How to use the lockdown mode on Galaxy S9 and S9+ with Android Pie update?
      • How to use the night mode on Galaxy S9 and S9+ with Android Pie update?
      • How to remap Bixby button on Galaxy S9 and S9+ after updating to Android Pie?
      • How to use Bixby quick commands on Galaxy S9, S9+, S8, S8+, Note 8, and Note 9 with the Android Pie update?
      • How to update Galaxy S9 or S9 Plus to Android Pie (Android 9)?
      • How to use the lift to wake feature on Galaxy S9 and S9+ with Android Pie update?
      • How to use the new Recents screen in Android Pie update for Galaxy S9 and S9 Plus?
      • How to use the floating keyboard on Galaxy S9 and S9+ with Android Pie update?
      • How to lock Galaxy S9 home screen layout on Galaxy S9 and S9+ with Android Pie update?
      • How to use the rotation toggle to change and lock screen orientation in Android Pie update for Galaxy S9 and S9 Plus?
      • How to use the updated camera app in Android Pie update for Galaxy S9 and S9 Plus?
    • Meaning of Galaxy S9 status icons and notification icons in Samsung Galaxy S9 and S9+
      • How to use Samsung DeX with Galaxy S9 and S9+ and other Samsung phones?
      • How to use Multi Window on Galaxy S9 and S9+?
      • How to use app pair on Galaxy S9 and S9+?
      • Samsung DeX Station vs Samsung DeX Pad vs Samsung DeX cable
      • How to use Samsung DeX Station for Galaxy S9, S9+, S8, S8+, Note 8 and Note 9?
      • How to use Samsung DeX Pad for Galaxy S9, S9+, S8, S8+, Note 8 and Note 9?
      • How to use a USB flash drive on Galaxy S9 and S9+?
    • How to charge Galaxy S9 battery?
    • Galaxy S9 SIM card guide
      • How to use two SIM cards on Galaxy S9, S10, and S20?
      • How to use Galaxy S9 dual messenger to run two accounts of messenger apps simultaneously on Galaxy S9 and S9+?
      • How to use micro SD card on Galaxy S9 and S9+?
      • How to back up Galaxy S9 and S9+?
      • How to use smart switch to transfer and migrate data to Galaxy S9 or S9+?
      • How to reset Galaxy S9 and S9+? What is Galaxy S9 factory data reset?
    • How to disable Bixby button in Galaxy S9 and S9+?
      • How to remove Bixby Home from Galaxy S9 Home screen?
    • Understand and Use Galaxy S9 Home screen
      • How to use Galaxy S9 edge screen on Galaxy S9 and S9+?
      • How to show photos on Galaxy S9 Home screen?
      • How to pin files to Galaxy S9 Home screen (add file shortcuts to Galaxy S9 Home screen)?
      • How to use Galaxy S9 Apps screen on Galaxy S9 and S9+?
      • How to use Galaxy S9 Home screen edit mode to customize Galaxy S9 Home screen?
      • How to use Galaxy S9 home screen landscape mode?
      • How to hide Galaxy S9 apps screen and how to hide Galaxy Apps button?
      • How to use and customize Galaxy S9 navigation bar and navigation buttons?
      • How to manage Galaxy S9 Home screen panels on Galaxy S9 and S9+?
    • How to use and customize Galaxy S9 lock screen?
      • How to use Galaxy S9 always-on display (AOD) on Galaxy S9 and S9+?
    • How to use Galaxy S9 notification panel on Galaxy S9 and S9+?
      • How to use Do Not Disturb on Galaxy S9 and S9+?
      • Understand and use Galaxy S9 notification number badge (notification dots, app icon badge)
      • How to use quick setting buttons on Galaxy S9 and S9+?
      • How to use quick-open notification panel on Galaxy S9 and S9+ to check notifications?
    • Galaxy S9 layout (and layout of Galaxy S9+)
      • How to use adapt sound on Galaxy S9 and S9+?
      • 5 ways to take screenshots on Galaxy S9 and S9+ without using any apps
      • How to use Galaxy S9 touchscreen gestures?
      • How to use wireless printing on Galaxy S9 and S9+?
      • How to use Galaxy S9 themes to customize the look and feel of Galaxy S9 and S9+?
      • Unbox Galaxy S9: understand package contents in Galaxy S9 box and S9+ box
    • How to reboot into Galaxy S9 recovery mode and to clear Galaxy S9 cache partition on Galaxy S9 and S9+?
      • How to reboot Galaxy S9 and S9+ if Galaxy S9 hangs?
      • How to use Galaxy S9 safe mode on Galaxy S9 and S9+?
    • How to use Galaxy S9 camera app?
      • 6 ways to start Galaxy S9 camera app in Galaxy S9 and S9+
      • Understanding and use Galaxy S9 camera settings
      • How to use super slow motion mode (super Slow-mo) on Galaxy S9 and S9+?
      • How to use Galaxy S9 camera Pro Mode on Galaxy S9 and S9+?
  • New features
    • Top 9 new features of Android Pie update for Galaxy S9 and S9+
      • How to use the lockdown mode on Galaxy S9 and S9+ with Android Pie update?
      • How to use the new navigation gestures in Android Pie update for Galaxy S9 and S9+?
      • How to use the night mode on Galaxy S9 and S9+ with Android Pie update?
      • How to remap Bixby button on Galaxy S9 and S9+ after updating to Android Pie?
      • How to update Galaxy S9 or S9 Plus to Android Pie (Android 9)?
      • How to use the lift to wake feature on Galaxy S9 and S9+ with Android Pie update?
      • How to use the new Recents screen in Android Pie update for Galaxy S9 and S9 Plus?
      • How to use the floating keyboard on Galaxy S9 and S9+ with Android Pie update?
      • How to lock Galaxy S9 home screen layout on Galaxy S9 and S9+ with Android Pie update?
      • How to use the rotation toggle to change and lock screen orientation in Android Pie update for Galaxy S9 and S9 Plus?
      • How to use the updated camera app in Android Pie update for Galaxy S9 and S9 Plus?
      • How to use Bixby quick commands on Galaxy S9, S9+, S8, S8+, Note 8, and Note 9 with the Android Pie update?
    • Top 10 new features of Samsung Galaxy S9 and Galaxy S9+
    • How to remove Bixby Home from Galaxy S9 Home screen?
    • How to use and customize Galaxy S9 navigation bar and navigation buttons?
    • How to use super slow motion mode (super Slow-mo) on Galaxy S9 and S9+?
    • Understand and use Galaxy S9 notification number badge (notification dots, app icon badge)
    • How to use Samsung DeX Pad for Galaxy S9, S9+, S8, S8+, Note 8 and Note 9?
    • How to use Galaxy S9 home screen landscape mode?
    • Understanding and use Galaxy S9 camera settings
    • How to use dual aperture to manually switch Galaxy S9 camera aperture in Pro mode?
    • Galaxy S9 layout (and layout of Galaxy S9+)
    • How to use app pair on Galaxy S9 and S9+?
  • Camera
    • How to use Galaxy S9 camera app?
    • How to use the updated camera app in Android Pie update for Galaxy S9 and S9 Plus?
    • Understanding and use Galaxy S9 camera settings
    • 6 ways to start Galaxy S9 camera app in Galaxy S9 and S9+
    • How to use dual aperture to manually switch Galaxy S9 camera aperture in Pro mode?
    • How to use super slow motion mode (super Slow-mo) on Galaxy S9 and S9+?
    • How to use Galaxy S9 camera Pro Mode on Galaxy S9 and S9+?
    • How to show photos on Galaxy S9 Home screen?
  • Official User Guides
    • Official user manuals for Galaxy S9 and S9 Plus with Android Pie update
    • Official Samsung Galaxy S9 user guides (Oreo)
  • Accessories
    • How to use Samsung Galaxy S9 clear view standing cover (S-view cover)?
    • Samsung Galaxy S9 LED wallet cover guide
    • How to use micro SD card on Galaxy S9 and S9+?
    • How to use Samsung DeX with Galaxy S9 and S9+ and other Samsung phones?
      • Samsung DeX Station vs Samsung DeX Pad vs Samsung DeX cable
      • How to use Samsung DeX Station for Galaxy S9, S9+, S8, S8+, Note 8 and Note 9?
      • How to use Samsung DeX Pad for Galaxy S9, S9+, S8, S8+, Note 8 and Note 9?
      • How to use a USB flash drive on Galaxy S9 and S9+?

Galaxy S9 home screen

How to use Bixby quick commands on Galaxy S9, S9+, S8, S8+, Note 8, and Note 9 with the Android Pie update?

simon · Leave a Comment

use Bixby quick commandsBixby quick commands allow you to use your own phrases to execute a set of commands (tasks) defined by you. No other voice assistant systems have this feature yet.

You can execute Bixby quick commands using voice, or just tap an icon on the home screen without using your voice.

This Galaxy S9 Android Pie update explains everything you need to know about Bixby quick commands and shows you how to create, modify and use Bixby quick commands on Galaxy S9 and S9+.

The Bixby quick commands feature are also available on all Galaxy phones with Android Pie update. So, this guide also applies to Galaxy S8, S8+, Note 8, Note 9, and S10 (all 4 S10 models).

What are Bixby quick commands on Galaxy S9, S9+, S8, S8+, Note 8, and Note 9 with the Android Pie update?

In a nutshell, a Bixby quick command lets you encapsulate multiple commands in one simple phrase you choose. Once created, you can use the simple phrase (which becomes one of your Bixby quick commands) to execute all commands encapsulated in sequence (as you defined).

You can also make a long command shorter with a Bixby quick command.

In fact, this is NOT a new feature in Android Pie update.  The feature is available before the Android Pie update. But it was buried deep in My Bixby. So, many Bixby users are not aware of the feature.

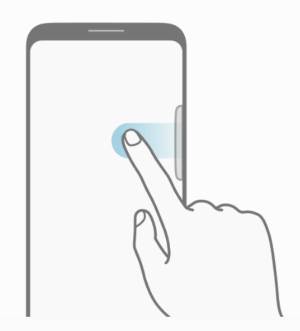
In the Android Pie update for Galaxy phones, in addition to allowing you to remap the Bixby button, Samsung made the Bixby quick commands feature more prominent and improved it significantly.

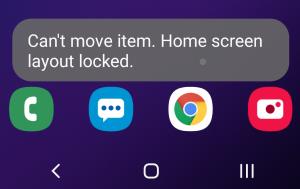
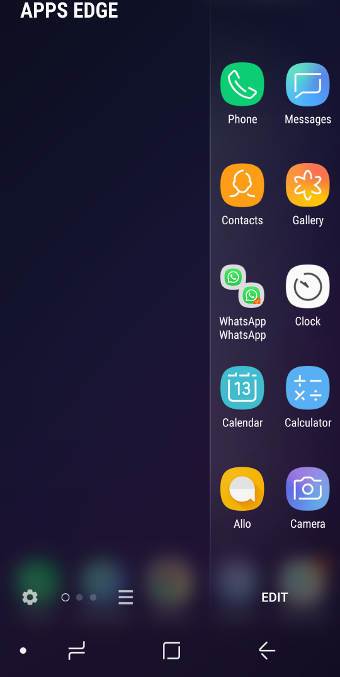
For example, after the February update, you can even add any of the Bixby quick commands to the Home screen and use it without using your voice. You can use it just like using an app.

Another improvement of the Bixby quick commands feature in the Android Pie update is that some examples were added.  You can add them to your Bixby quick commands directly, or modify them as a template to create your own quick commands.

How to create, modify, and manage your Bixby quick commands on Galaxy S9, S9+, S8, S8+, Note 8, and Note 9 with the Android Pie update?

Bixby quick commands are tied to your Samsung account. By default, there are no quick commands in your account.

So, you have to create your quick commands … Read the rest

Filed Under: Galaxy S9 New Features Tagged With: Android Pie, Android Pie update guide, Bixby, Bixby button, Bixby Home, Bixby quick command, Bixby vision, Bixby voice, Galaxy Note 8, Galaxy Note 9, Galaxy S10, Galaxy S8, Galaxy S9 home screen

How to lock Galaxy S9 home screen layout on Galaxy S9 and S9+ with Android Pie update?

simon · 1 Comment

lock Galaxy S9 home screen layout Android Pie update for Galaxy S9 and S9+ allows you to lock Galaxy S9 home screen layout so that you will not lose you customization due to accidental touches.

Although it sounds trivial and can be found in some other Android phones, many Galaxy S9 and S9+ owners will find this is one of the very useful features of Android Pie update for Galaxy S9 and S9+.

This Galaxy S9 Android Pie update guide shows you how to lock Galaxy S9 home screen layout on Galaxy S9 and S9+ with Android Pie update, and what the caveats are if you lock the home screen layout.

Why you may need to lock the home screen layout?

You can customize the Galaxy S9 home screen in many ways. You can use third-party themes, remove Bixby Home from the home screen, change wallpapers, adjust the grid layout, add app folders, pin individual files to the home screen, show photos on Galaxy S9 home screen (using widgets), and manage home screen panels.

Besides, Galaxy S9 and S9+ also support landscape mode of the Galaxy S9 home screen.

But very easily, the customization can be instantly wiped by accidental taps.  For example, your kids may delete the widgets from the screen if they get their hands on the screen.

Many Galaxy S9 and S9+ owners want to lock the customization after the initial setup because most owners seldom change the home screen after one or two months.

Now, in the Android Pie update for Galaxy S9 and S9+, you can lock Galaxy S9 home screen layout so that you will not lose your customization so easily.

Of course, it only locks the layout. You cannot add or delete app icons or widgets once you lock Galaxy S9 home screen layout. But you can still use Galaxy S9 home screen edit mode to customize the home screen.

How to lock the Galaxy S9 home screen layout?

As other new features of Android Pie update for Galaxy S9 and S9+, the lock home screen layout feature is not enabled by default.

You need to enable this feature to lock the home screen layout.

In Galaxy s9 Settings, tap Display as shown below.

Settings Home screen settings

In the display settings page, as shown in the screenshot above, tap Home screen.

In the home screen settings page, you can then find … Read the rest

Filed Under: Galaxy S9 Guides, Galaxy S9 New Features Tagged With: Android Pie, Android Pie update guide, app folders, apps icon grid, Bixby Home, Galaxy S9 home screen, galaxy S9 home screen edit mode, Galaxy S9 home screen landscape mode, Galaxy S9 Home screen panel, Galaxy S9 themes, Galaxy S9 widgets, lock down, pin files to Galaxy S9 home screen, Samsung themes, show photos on Galaxy S9 home screen

How to use the night mode on Galaxy S9 and S9+ with Android Pie update?

simon · 2 Comments

use the night mode on Galaxy S9 and S9+ with Android Pie updateIn Android Pie update for Galaxy S9 and S9+, you can use the night mode on Galaxy S9 and S9+ to get the dark (black) theme at any time (not only in the night).

The night mode on Galaxy S9 and S9+ with Android Pie update is the combination of the dark theme and night mode. In the stock Android Pie, the settings of dark theme and night mode are independent of each other.

This Galaxy S9 Android Pie update guide explains the details of the night mode on Galaxy S9 and S9+ with Android Pie update, and how to use the night mode so that you can enjoy the phone in all situations.

What is the night mode on Galaxy S9 and S9+ with Android Pie update?

In Android Nougat update, Samsung introduced the blue light filter to tint the screen so that you can use the screen comfortably for a long time (e.g., for reading), or in a dimmed environment.

Many owners also hate the default white theme, which looks great in the showroom. For day-to-day use, many owners preferred a dark theme.

Of course, you can use third-party themes to customize the Galaxy S9 home screen and Samsung apps. But most of the dark themes in the Galaxy Apps (theme store) are poorly designed.

In Android Pie, Google introduced a dark theme. But it does not apply to Settings or to most Google apps.

Besides, Android Pie also introduced the night mode in developer options. But it is independent of the theme settings if dark them is used already. You may refer to this guide on how to use the dark theme and night mode in stock Android Pie.

In the Android Pie update for Galaxy S9 and S9+, Samsung added the night mode as an alternative to the default light theme.

The night mode on Galaxy S9 and S9+ with Android Pie update lets you:

  • Set the display to the dark (black) theme.
  • Apply the dark theme to Galaxy S9 Home screen, Apps screen, Settings, quick settings, notifications panel, power button options, Bixby home, most Samsung apps include Phone, Messages, Contacts, Camera, Gallery, Clock, Calendar, Calculator, Samsung Notes, Email, My Files, Internet, Bixby, Finder.
  • Instantly turn on/off night mode in quick settings.
  • Instantly change the night mode settings in the developer options as “always-on”
… Read the rest

Filed Under: Galaxy S9 Guides, Galaxy S9 New Features Tagged With: Android Pie, Android Pie update guide, Bixby Home, blue light filter, dark theme, developer options, Galaxy apps, Galaxy S9 apps screen, Galaxy S9 home screen, Galaxy S9 notification panel, Galaxy S9 settings, Galaxy S9 themes, Gallery app, My Files, navigation gestures, night mode, power button options, quick setting buttons

How to use the lockdown mode on Galaxy S9 and S9+ with Android Pie update?

Everything you need to know about Android Pie lockdown mode on Galaxy S9 and S9+

simon · Leave a Comment

Everything you need to know about Android Pie lockdown mode on Galaxy S9 and S9+ You can use Android Pie lockdown mode on Galaxy S9 and S9+ with Android Pie (Android 9) update to temporally disable biometric unlock and smart lock. PIN or password will be required to unlock the phones.

The lockdown mode is a standard security feature in Android Pie (Android 9).  Luckily, Samsung did not mess up this feature in the One UI.

This Galaxy S9 Android Pie update guide explains everything you need to know about the lockdown mode on Galaxy S9 and S9+ with Android Pie update and shows you how to use it.

You may also check this updated guide on using lockdown mode on Galaxy S9, S10, S20, S21, and S22.

What is the lockdown mode on Galaxy S9 and S9+ with Android Pie update?

If enabled, Galaxy S9 and S9+ offer many ways to unlock the phone.

In addition to PIN/password/pattern, you can also unlock Galaxy S9 and S9+ using:

  • Fingerprints.
  • Iris.
  • Face.
  • Trusted devices, trusted places, trusted faces, and matched voices through the smart lock.

All these additional unlock methods are provided for your convenience.  Many Galaxy S9 and S9+ owners enjoy these fast unlock methods.

However, in some special situations, for example, someone attempts to force you to unlock the phone to get your data, you may try to disable these unlock methods temporally (and quickly), then type the wrong password/PIN a few times so that you have to wait longer and longer to try again.

When the lockdown mode is enabled, notifications will not be shown on the Galaxy S9 lock screen.

The lockdown mode is one of the new features in Android Pie.  Samsung kept the stock feature and did not mess it up this time in the Android update for Galaxy S9 and S9+, unlike what they did to the navigation gestures.

How to enable the lockdown mode on Galaxy S9 and S9+ with Android Pie update?

By default,  the lockdown mode on Galaxy S9 and S9+ with Android Pie update is not enabled.

You need to enable it in the power button options (power menu) before you can use it.

As shown in the screenshot below, tap Lock screen in Galaxy S9 Settings.

enable the lockdown mode on Galaxy S9 and S9+ with Android Pie update enable the lockdown mode on Galaxy S9 and S9+ with Android Pie update

As shown above, in the lock screen settings page, tap Secure lock settings.

In the secure lock settings, as shown below, you can find the Show lockdown option.… Read the rest

Filed Under: Galaxy S9 Guides, Galaxy S9 New Features Tagged With: Android Pie, Android Pie update guide, Galaxy S9 apps screen, Galaxy S9 home screen, Galaxy S9 layout, Galaxy S9 lock screen, Galaxy S9 notifications, Galaxy S9 safe mode, Galaxy S9 touch screen gesture, lock down, lockdown mode, navigation gestures, power button, power button options, power off Galaxy S9, power on Galaxy S9, screenshot, smart lock

How to use the new navigation gestures in Android Pie update for Galaxy S9 and S9+?

simon · 37 Comments

How to use the new navigation gestures in Android Pie update for Galaxy S9 and S9+? In Android update for Galaxy S9 and S9+, Samsung did not implement the stock Android Pie navigation gestures. Instead, they added their own new navigation gestures as one of the new features in the One UI.

Some owners may get confused on the new navigation gestures in Android Pie update for Galaxy S9 and S9+, especially those who tried the navigation gestures in the stock Android Pie.

This Galaxy S9 Android Pie update guide explains the details of the new navigation gestures in Android Pie update for Galaxy S9 and S9+,  the difference between the Android Pie navigation gestures and the full-screen navigation gestures in Android Pie update for Galaxy S9 and S9+, and show you how to enable and use them.

What are the new navigation gestures in Android Pie update for Galaxy S9 and S9+?

In Android Pie (Android 9), Google introduced a set of gestures for the home buttons, Android Pie navigation gestures, to help users to navigate and switch apps very quickly.

Essentially, in stock Android Pie, if the navigation gestures are enabled, the Recents/Overview button will be removed. The back button appears only if it is needed. This creates a very clean UI with one Home button as explained in this page.

Of course, Samsung thought they have a better solution.

In the Android Pie update for Galaxy S9 and S9+, Samsung chooses to collapse the 3 navigation buttons into 3 lines on the bottom of the screen. You then just swipe up from these 3 lines to replace the function of pressing the buttons.

So, you will find the new navigation gestures in Android Pie update for Galaxy S9 and S9+ are substantially different from the Android Pie navigation gestures.

The major differences between Android Pie navigation gestures and the new navigation gestures in Android Pie update for Galaxy S9 and S9+ include:

  • In the stock Android Pie, all navigation gestures are based on the home button. In Android Pie update for Galaxy S9 and S9+, there are 3 lines for the gestures.
  • In the stock Android Pie, you have 5 touch screen gestures for the home button: press (tap), long press (long tap), swipe upwards, slow swipe upwards (or double swipe upwards), swipe to the right, swipe to the right and hold. But in Galaxy S9 and S9+, swipe upwards is the only
… Read the rest

Filed Under: Galaxy S9 Guides, Galaxy S9 New Features Tagged With: Android Pie, Android Pie update guide, button order, Galaxy S9 Home button, Galaxy S9 home screen, Galaxy S9 navigation bar, Galaxy S9 navigation button, Galaxy S9 touch screen gesture, navigation gestures, One UI

Top 9 new features of Android Pie update for Galaxy S9 and S9+

One UI, night mode, lift to wake, floating keyboard, lock home screen layout, lockdown mode, new camera app, navigation gestures, and adaptive battery are the most exciting new features of Android Pie update for Galaxy S9 and S9+.

simon · 8 Comments

Top 9 new features of Android Pie update for Galaxy S9 and S9+If your Galaxy S9 or S9+ was updated to Android Pie, you should enjoy many new features of Android Pie update for Galaxy S9 and S9+

As the first major update of Galaxy S9 and S9+, Android Pie (Android 9) update brings not only Android Pie features to Galaxy S9 and S9+ but also a totally new UI (One UI).  Some  Galaxy S9 and S9+ owners may be overwhelmed by so many new features of Android Pie update for Galaxy S9 and S9+.

If you haven’t updated your Galaxy S9 or S9 to Android Pie (Android 9), you may follow this guide to check whether the update is available in your region.

If you want to download the official user manuals for Galaxy S9 and S9+ with Android Pie update, please check this page.

This Galaxy S9 Android Pie update guide explains the top 9 most useful new features of Android Pie update for Galaxy S9 and S9+: One UI, night mode, lift to wake, floating keyboard, lock home screen layout, lockdown mode, new camera app, navigation gestures, and adaptive battery.

# 1. One UI: the most eye-catching new features of Android Pie update for Galaxy S9 and S9+

In the Android Pie update, Samsung debuted the new UI: One UI, to replace the old Samsung Experience.

Do not confuse one UI with Android One. They are totally unrelated.

The One UI was designed to make the phone look beautiful and help the owner focus on what really matters.

In addition to a new set of app icons for Samsung apps (phone, camera, contact, messages, gallery, My files, calendar, smart switch, clock), the default font and the use of white space deliver a fresh look.

The new full-screen navigation gestures were also added and they are even different from the stock Android Pie navigation gestures.

You can also use the rotation toggle button in the navigation bar to change and lock screen orientation on-the-fly very easily.

#2. Night mode: the most wanted new features of Android Pie update for Galaxy S9 and S9+ for night owls

Many Galaxy S9 and S9+ owners complained about the white color scheme.  It is painful to use the white theme in low-light conditions.

Although you can change the Galaxy S9 home screen theme to a dark one, some Samsung apps may not follow the theme.

Blue light filter may … Read the rest

Filed Under: Galaxy S9 Guides Tagged With: adaptive battery, Android Pie, Android Pie update guide, Android update, Bixby quick command, blue light filter, Galaxy S9 camera, Galaxy S9 camera app, Galaxy S9 home screen, Galaxy S9 new features, lift to wake, lockdown mode, navigation buttons, navigation gestures, night mode, One UI, Samsung DeX, Samsung DeX cable, Samsung keyboard, Samsung keyboard floating mode, update Galaxy S9

Galaxy S9 Android Pie update guides

Use the new features of Android Pie (Android 9) update for Galaxy S9 and S9+

simon · 2 Comments

Galaxy S9 Android Pie update guidesAndroid Pie update for Galaxy S9 and S9+ has been rolled out since December 2018.

More and more Galaxy S9 and S9+ owners are enjoying the new features of Android Pie update.  Samsung also updated the official user guide with Android Pie update.

Android Pie (Android 9) is a major update for Android. There are many new features in Android Pie.

On top of the standard Android Pie features, Samsung also updated the UI for Galaxy S9 and S9+ to One UI.

So, many Galaxy S9 and S9+ owners sometimes get confused on how to use the new features in Android Pie (Android 9) update for Galaxy S9 and S9+.

A series of guides on new features of Android Pie update for Galaxy S9 and S9+ have been prepared and tested since December 2018.

Now, we are releasing these Android Pie guides for Galaxy S9 and S9+ here.

This is a live post. A new guide is released only after it passes all our testing and verifications. We will update this post once a new guide is released.

Here is the list of released or coming-soon guides on the new features of Android Pie (Android 9) update for Galaxy S9 and S9+.

If you cannot find the Android Pie guides you need, or if you have any questions on Android Pie features on Galaxy S9 and S9+, please let us know them in the comment box.

We will try to release the guide earlier, and the community will help you get the answer or solution.

1.  Top 9 new features of Android Pie update for Galaxy S9 and S9+

As the first major update of Galaxy S9 and S9+, Android Pie (Android 9) update brings not only Android Pie features to Galaxy S9 and S9+ but also a totally new UI (One UI).

This Galaxy S9 Android Pie update guide explains the top 9 most useful new features of Android Pie update for Galaxy S9 and S9+ including One UI, night mode, lift to wake, floating keyboard, lock home screen layout, lockdown mode, new camera app, navigation gestures, and adaptive battery

Read on …

2. The official Galaxy S9 and S9+ user guides with Android Pie update for Galaxy S9 and S9+

 You can read online or download the official user manuals for Galaxy S9 and S9 Plus with Android Pie update in your local language for your … Read the rest

Filed Under: Galaxy S9 Guides, Galaxy S9 New Features Tagged With: Android Pie, Android Pie update guide, Android update, AOD, floating keyboard, Galaxy S9 always-on display (AOD), Galaxy S9 camera app, Galaxy S9 home screen, Galaxy S9 multiwindow, Galaxy S9 new features, Galaxy S9 notifications, lift to wake, lock down, navigation gestures, night mode, pop-up view, Recents screen, Samsung keyboard floating mode, scene optimizer, split screen view, update Galaxy S9

How to use app pair on Galaxy S9 and S9+?

You can launch two apps simultaneously with app pair on Galaxy S9, S9+, S8, S8+, Note 8 and Note 9.

simon · Leave a Comment

use app pair on Galaxy S9 and S9+App pair on Galaxy S9 and S9+ allows you to launch and use two apps as a pair in the split-screen view of the Multi Window mode.

Samsung first introduced app pair on Galaxy Note 8 on 2017. It was then available for all newer Galaxy phones including Galaxy S9, S9+ and Note 9. App pair was also backported to Galaxy S8 and S8+ in the Android Oreo update.

This Galaxy S9 guide explains how app pair works on Galaxy S9 and shows you the two methods of creating app pairs. The guide also shows you how to manage app pairs and how to use app pair together with dual messengers.

As mentioned, the app pair is not an exclusive feature of Galaxy S9 or S9+. Instead, it is a standard Multi Window feature on Samsung phones with Android Oreo. So, this guide applies to other Samsung Galaxy phones including Galaxy Note 8, S8, S8+ and Note 9 as well.

What is app pair on Galaxy S9 and S9+?

As explained in the Galaxy S9 Multi Window guide, you can use two apps in the split screen view simultaneously.

You may need to use a certain pair of apps often. App pair is to address this demand: you create a pair so that the two apps are launched in the split screen view directly.

Of course, this is faster than the old workflow: entering Multi Window mode,  then selecting apps.

Even better, you can use app pair in Galaxy S9 edge screen to launch the two apps without navigating to the home screen.

Essentially, app pair on Galaxy S9 is a shortcut to the split-screen view of two apps. You can put the shortcut on Galaxy S9 home screen or edge screen.

If you are using the dual messenger feature to run two copies of messenger apps (e.g., WhatsApp), you can put these two copies of the messenger app in the app pair so that you can check messages in two accounts simultaneously.

Two ways to create an app pair on Galaxy S9 and S9+?

There are at least two methods to create an app pair on Galaxy S9 or S9+:

  1. Converting the current split-screen view to an app pair;
  2. Manually creating an app pair in the apps edge of Galaxy S9 edge screen settings.

Method 1: Converting current split-screen view to an app pair

When … Read the rest

Filed Under: Galaxy S9 Guides Tagged With: app pair, apps edge, dual messenger, Galaxy S9 edge screen, Galaxy S9 home screen, Galaxy S9 multiwindow, Galaxy S9 touch screen gesture, Multi Window, split screen view

How to use Galaxy S9 camera Pro Mode on Galaxy S9 and S9+?

Everything about Samsung camera Pro mode on Galaxy S9, S9+, S8, S8+, S7, S7 edge, Note 9 and Note 8.

simon · 11 Comments

use Galaxy S9 camera Pro Mode on Galaxy S9 and S9+Galaxy S9 camera Pro mode gives you full control of your shootings: ISO, aperture, shutter speed, autofocus mode,  filters, white balance, and exposure. If you properly use the Galaxy S9 camera Pro mode, you may get far better pictures than using the Auto mode (default).

But for many users without photographic backgrounds, sometimes, it is overwhelming to adjust the settings for Galaxy S9 camera Pro mode to get the desired photos.

This Galaxy S9 camera guide explains the what Galaxy S9 camera Pro mode is, when you may need it, and all settings for Galaxy S9 camera Pro mode.

Please note, Galaxy S8, S8+, Note 8 and Note 9 have a similar Pro mode to that on Galaxy S9 and S9+.  So, this guide also applies to the Pro mode in these Samsung phones.

What’s Galaxy S9 camera Pro mode? When do you need it?

In the old days, smartphone cameras are usually inferior to many middle-range (sometimes, even entry-level) point-and-shoot cameras. And it is impossible to compare them to DSLRs.

But in recent years, with the advances in camera sensor technology and software, more and more high-end smartphones can replace middle-range point-and-shoot cameras. Some Android phone vendors started to offer some photographic features that used to be exclusive in DSLR cameras

Since Galaxy S6, Samsung has included the Pro mode in many of its phones. But the quality of photos taken in the Pro mode depends on the phone hardware and software.

With Galaxy S9 camera Pro mode, some users now can easily get many far better photos than in the Auto mode.

Galaxy S9 camera Pro mode allows you:

  • Adjust the ISO value
  • Adjust the aperture to use the dual apertures as explained in this guide.
  • Adjust the shutter speed.
  • Adjust the autofocus mode.
  • Choose camera filters.
  • Adjust the white balance.
  • Adjust exposure compensation.
  • Save photos in RAW format.

You may want to try the Pro mode whenever you are not satisfied with photos taken in the Auto mode or other camera modes.

For example, in the low-light conditions, you may play with the ISO value and shutter speed to get less noisy photos in Pro mode. The Auto mode in this situation sometimes works well; sometimes not.

Or, if the lighting conditions vary dramatically in different parts of the photo, you can choose the proper ISO value,  shutter speed, white balance, … Read the rest

Filed Under: Galaxy S9 Camera Guides, Galaxy S9 Guides Tagged With: autofocus, dual aperture, exposure, Galaxy S9 camera, Galaxy S9 camera app, Galaxy S9 camera effects, Galaxy S9 camera modes, Galaxy S9 camera settings, Galaxy S9 home screen, Galaxy S9 home screen landscape mode, ISO, landscape mode, Pro mode, RAW format, shutter speed, white balance

How to use Multi Window on Galaxy S9 and S9+?

The ultimate guide of Multi Window on Galaxy phones: how to use split screen view, pop-up view and snap window.

simon · 2 Comments

The ultimate guide of Multi Window on Galaxy phones: how to use split screen view, pop-up view and snap window.Galaxy S9 Multi Window allows you to use two or more apps simultaneously on Samsung Galaxy S9 or S9+ to improve your productivity.

This Galaxy S9 guide explains what Multi Window can do for you, how to use split-screen view, how to use the pop-up view, and how to use the snap window on Galaxy S9 and S9+.

Update: a new section of Changes of Multi-Window in Android Pie update for Galaxy S9 and S9+ was added. In Android Pie update for Galaxy S9 and S9+, many Multi Window features were removed.  Please check this section and Android Pie update guide for details. You may also check this guide for using the Multi Window on Galaxy S9 and S8 with Android Pie.

As Multi Window is available in many other Galaxy phones, this guide also applies to many other Samsung Galaxy phones and tablets including Galaxy S8, S8+, Note 8 and Note 9.

What is Multi Window on Galaxy S9 and S9+?

Multi Window on Galaxy S9 and S9+ allows you to use two apps side-by-side in the split-screen view, or simultaneously use two or more apps in the pop-up view.

For example, you may want to browse the info of a product in the Amazon app and share some key info with your friends in the Messages app.

Or you may want to get some numbers from a spreadsheet in Google Sheets for an email.

Without the Multi Window, you will have to switch between apps several times.

If you are familiar with Multi Window on Galaxy S9 and S9+, you can greatly improve your productivity, and therefore get a better ROI of your Galaxy S9 or S9+.

Samsung introduced Multi Window many years in Galaxy Note 2 in 2012, which is 4 years earlier than the stock multiwindow feature introduced in Android Nougat.

Over the years, Samsung has improved and polished the multiwindow feature and made it one of the best features in Galaxy phones.

Basically, if you need to switch apps a few times for a task, you very likely will benefit from the Multi Window feature once you get used to it.

What are the two Multi Window modes on Galaxy S9 and S9+?

There are two screen modes of Multi Window on Galaxy S9 and S9+:

  • Split-screen view.
  • Pop-up view.

In the split-screen view, two apps share the whole … Read the rest

Filed Under: Galaxy S9 Guides Tagged With: Android Pie, Android Pie update guide, app pair, Galaxy S9 Home button, Galaxy S9 home screen, Galaxy S9 Home screen panel, Galaxy S9 multiwindow, Galaxy S9 navigation bar, Galaxy S9 navigation button, Galaxy S9 notification panel, Galaxy S9 notifications, Galaxy S9 settings, Galaxy S9 status bar, Galaxy S9 touch screen gesture, long tap gesture, Multi Window, navigation gestures, pop-up view, Recents screen, snap window, split screen view

How to use Samsung DeX with Galaxy S9 and S9+ and other Samsung phones?

A Definitive Samsung DeX Guide

simon · Leave a Comment

DeX pad Samsung DeX lets you turn your Galaxy S9, S9+, S10, S10+ S8, S8+, Note 8, Note 9, and Note 10  into a PC with a big screen, a full-size keyboard, and a mouse.

For Galaxy S8, S8+, S9, S9+ and Note 8, a Samsung DeX station or Dex Pad is needed to use the DeX mode.  For Galaxy Note 9 and S10, a USB-C to HDMI cable is sufficient.

This Samsung DeX guide explains the details of the Samsung DeX, shows you how to use Samsung DeX, answers questions you may have on it.

This guide applies to Samsung Galaxy S10, Galaxy S10+, Galaxy S9, Galaxy S9+, Galaxy S8, Galaxy S8+, Galaxy Note 8, Galaxy Note 9, and Galaxy Note 10, although most of the screenshots were taken from Galaxy S9.

Galaxy Note 10 added the DeX for PC. You can use the DeX screen on your PC or laptop with a USB cable. This feature is currently only available on Galaxy Note 10 and Galaxy Note 10+. Please check this guide on how to use DeX for PC.

We will update this page once DeX for PC is enabled on other Samsung devices.

Update 1:  Samsung DeX for PC is now also available on Galaxy S10 (including S10+, and S10e) after the September update as explained on this page.

What is Samsung DeX? What do you need to use Samsung DeX?

For Galaxy S and Galaxy Note phones, it is always easy to connect to external monitor or TVs using a micro USB MHL adapter (for Galaxy S or Note devices prior to Galaxy Note 7 with a micro USB port), or a USB C to HDMI cable (for Galaxy S or Note devices with a USB type C port like Galaxy S8, Galaxy S8+, Galaxy Note 8, Galaxy S9, Galaxy S9+ and Galaxy Note 9).

In addition to MHL support, Samsung also incorporated Micracast support in most in these devices. In recent versions of Galaxy S and Note devices, the Miracast support is limited to  Samsung’s implementation only.

So, for Galaxy S9 and S9+, you can use at least the following three methods to mirror the phone screen to a TV or external monitor:

  • Use a USB-C to HDMI cable (like the official Samsung USBC to HDMI cable).
  • Use Miracast to cast the screen to a Samsung TV or monitor through WiFi direct.  It may not
… Read the rest

Filed Under: Galaxy S9 Guides Tagged With: app folders, Chromecast, DeX, DeX for PC, Galaxy S9 apps screen, Galaxy S9 home screen, Hancom Office, Miracast, pin files to Galaxy S9 home screen, Samsung DeX, Samsung DeX cable, Samsung DeX Labs, Samsung DeX Pad, Samsung DeX settings, Samsung DeX station, screen mirroing, USB-C, USB-C to HDMI

How to use Galaxy S9 edge screen on Galaxy S9 and S9+?

Use and customize Galaxy S9 edge screen

simon · Leave a Comment

use Galaxy S9 edge screen on Galaxy S9 and S9+Galaxy S9 edge screen on Galaxy S9 and S9+ is one of the productivity features associated with the curved screen.

Although the edge screen on Galaxy S9 and S9+ is not a new feature, many Galaxy S9 and S9+ owners still know little about using edge screen to improve their experiences with the phone.

This Galaxy S9 guide explains the details of Galaxy S9 edge screen, and how to use and customize edge screen on Galaxy S9 and S9+.

Since Galaxy S8, the edge screen features are unified on Galaxy S and Note devices. So this guide also applies to edge screen on Galaxy S8,  S8+, Galaxy Note 8 and Galaxy Note 9.

What is Galaxy S9 edge screen? The history of the edge screen on Samsung Phones

Galaxy S9 edge screen can be traced back to Galaxy Note Edge (Note 4 Edge), on which Samsung introduced a separate physical screen on the right edge of the standard screen in 2014.

But the reception of a dedicated edge screen was not as warm as expected. So, Samsung introduced the new “shared” edge screen in Galaxy S6 edge and S6 edge+. The edge screen was further polished in Galaxy S7 edge. Since Galaxy S8, Samsung has used curved screens on all flagship phones (Galaxy Note and Galaxy S series),

Galaxy S9 edge screen is a more or less matured feature in both Galaxy S9 and S9+.

There is no dedicated edge screen. Instead, you can trigger some useful features in the (curved) edge part of the main screen.

Edge screen on Galaxy S9 and S9+ is actually a productivity and software feature. It allows you to quickly access some features like opening apps, access tasks or contact your favourite friends.

Although the edge screen is conceptualized with the curved screen, only edge lighting utilizes the curved display. Other Galaxy S9 edge screen features (edge panels) do not rely on the curved edges of the infinity display and therefore can be easily implemented on a flat screen,

By default, edge screen on Galaxy S9 and S9+ was enabled when you got the phone.

In the right edge of the screen, as shown below, you can find edge screen handle.

Swipe to the left side to access Galaxy S9 edge screen features.

Galaxy S9 edge screen Galaxy S9 edge screen

For example, you may open apps edge to quickly start a favourite app you added to … Read the rest

Filed Under: Galaxy S9 Guides Tagged With: apps edge, customize edge screen, disable edge screen, edge lighting, edge panels, edge screen handle, Galaxy S9 always-on display (AOD), Galaxy S9 edge screen, Galaxy S9 home screen, Galaxy S9 lock screen, Galaxy S9 settings, Galaxy S9 touch screen gesture, long tap gesture, people edge, tasks edge

How to pin files to Galaxy S9 Home screen (add file shortcuts to Galaxy S9 Home screen)?

use Samsung My Files to pin files to home screen

simon · Leave a Comment

pin files to Galaxy S9 Home screen (add file shortcuts to Galaxy S9 Home screen)You can pin files to Galaxy S9 Home screen so that you can open them directly by tapping them without fiddling through apps.  For example, you can add a PDF file to the home screen and open it without opening the file explorer or storage manager.

After you add files to Galaxy S9 home screen (to be precise, you are actually adding file shortcuts to the home screen), you can use them just like using apps and widgets: open, relocate, delete them.

A file pinned on the home screen always occupies one spot (icon). This is different from adding and showing photos on Galaxy S9 Home screen as a widget, which is resizable.

This Galaxy S9 guide shows you how to pin files to Galaxy S9 Home screen, manage files added to the home screen, and how to add files to task edge in the edge screen.

When you may want to pin files to Galaxy S9 Home screen (add files to the home screen)?

Many owners who use Galaxy S9 or S9+ as a productivity tool often need to open or edit some files repeatedly.

By default, this means you have to open a file explorer (e.g., My files), navigate to the folder, find the file, tap on it to let the default app to open it.

But if you pin the file on Galaxy S9 home screen (i.e. add a shortcut of the file to Galaxy S9 Home screen), then you can tap the shortcut on the home screen to open it straight away.

If you want to show photos on Galaxy S9 Home screen, you may check this guide.

When you pin a file to the home screen, you actually add a shortcut of the file to the home screen. The file is still in the original folder and is NOT moved.  If you delete the icon in the home screen, the corresponding file will NOT be removed. But if you update the file, the file in the original folder will be updated.

Technically, the shortcut (the pinned file) in Galaxy S9 home screen is a symbolic (soft) link to the original file, not a copy of the file.

How to pin files to Galaxy S9 Home screen?

There are many third-party apps that allow you to add file shortcuts to Galaxy S9 Home screen. But you do not install any of them.

The pre-installed … Read the rest

Filed Under: Galaxy S9 Guides Tagged With: app folders, default app, Galaxy S9 apps screen, Galaxy S9 edge screen, Galaxy S9 home screen, Galaxy S9 Home screen panel, Galaxy S9 notification panel, Galaxy S9 touch screen gesture, Galaxy S9 widgets, long tap gesture, micro SD card, My Files, pin files to Galaxy S9 home screen, tasks edge, USB flash drive

How to reset Galaxy S9 and S9+? What is Galaxy S9 factory data reset?

simon · Leave a Comment

reset Galaxy S9 and S9+You may have to reset Galaxy S9 or S9+ when the phone does not work as expected.

There are 3 levels of resetting for Galaxy S9 and S9+: reset network settings, reset Galaxy S9 settings (system settings) and factory data reset (FDR) Galaxy S9 or S9+.

This Galaxy S9 guide shows you how to use these three levels of resetting for your Galaxy S9 and S9+, and explains what you should do before trying to factory data reset Galaxy S9 or S9+.

What are the three levels of resetting for Galaxy S9 and S9+?

When you consider resetting Galaxy S9 or S9+, there are three levels of resetting:

  1. Reset network settings.
  2. Reset Galaxy S9 settings.
  3. Factory data reset (FDR).

Factory data reset (FDR, level 3) would erase everything on Galaxy S9 or S9+. You will get a “new ” phone to start with. You must back up all data on Galaxy S9 or S9+ before trying the factory data reset.

But remember, factory data reset will NOT roll back system updates.

Reset Galaxy S9 settings (level 2) removes the system settings added/customized by you,  but it does not erase your files and third-party app data.

Reset network settings (level 1) only remove network (mobile, WiFi, Bluetooth) settings. Other settings and user files are untouched.  You may use this resetting level when your phone has problems to connect to connect WiFi or mobile networks.

What should you do BEFORE trying Galaxy S9 factory data reset?

If you have to factory data reset Galaxy S9 or S9+,  you must be aware that all data and settings will be erased.  All apps installed by you will be removed as well.

And there is no undo option.

Before you factory data reset (FDR) for Galaxy S9 or S9+,  you should try to finish the following 3 tasks.

  • Back up, back up and back up your Galaxy S9 or S9+.

All your data, documents,  photos, other media files and apps will be erased.

So, it is important to back up your Galaxy S9 or S9+. You can use the Samsung Cloud and Google Photos to back up Galaxy S9 or S9+ to the cloud.

If you prefer backing up to your PC, you can install Smart Switch on the PC. Then you can back up everything to your PC.

Factory data reset will not erase files on the SD card. But app data … Read the rest

Filed Under: Galaxy S9 Guides Tagged With: Android update, back up, back up Galaxy S9, back up photos, device protection, factory data reset (FDR), Galaxy S9 apps screen, Galaxy S9 home screen, Galaxy S9 lock screen, Galaxy S9 quick settings panel, Galaxy S9 recovery mode, Galaxy S9 safe mode, Galaxy S9 settings, Galaxy S9 touch screen gesture, Google account, reboot Galaxy S9, reset, reset Galaxy S9, reset Galaxy S9 network settings, reset Galaxy S9 settings, Samsung account

How to back up Galaxy S9 and S9+?

A definite guide on backing up Galaxy S9 and S9 data to Samsung Cloud and Galaxy S9 photos to Google Photos

simon · Leave a Comment

How to back up Galaxy S9 and S9+?You should back up Galaxy S9 or S9+. Period.

The data saved in galaxy S9 or S9+ may be lost for many reasons: hardware failure, inadvertent operation/deletion, malware or virus, loss of the phone…

This Galaxy S9 guide shows you how to back up Galaxy S9 data to the Samsung Cloud, and back up photos on Galaxy S9 or S9+ too Google Drive (through Google Photos).

Why do you need to back up Galaxy S9 and S9+?

If the data (photos, documents, notes and others) in your phone are important, you should back up them.

The storage of the phone including the internal storage and micro SD card, like other modern electric components, may fail at any time.

You do not know when it will fail. It can be tomorrow, or after 10 years.

You may accidentally delete a file or a photo. In Android, by default, there is no undo option, and there is no recycle bin to keep deleted files.

You should never try your luck if the data are important.

The good news is that it is easy and straightforward to back up Galaxy S9 or S9+, and it is free.

What are the available methods to back up Galaxy S9 and S9+ data without using any third-party apps?

In fact, there are at least three free solutions for backing up the data on Galaxy S9 and S9+ without using any third party apps (Google Photos is preinstalled).

  1. Use Samsung Cloud to back up Galaxy S9 and S9+ fully.
  2. Use Samsung Cloud to back up (except photos) Galaxy S9/S9+ fully, and Google Photos to back up photos and videos.
  3. Use Google Drive to back up Galaxy S9 and S9+

Method 1: Use Samsung Cloud to fully back up Galaxy S9 and S9+.

Some owners may be not aware that Samsung offers 15GB (free) for each Samsung account.  And you can back up almost everything to Samsung cloud.

If you have multiple Galaxy phones (as old as Galaxy Note 4 and S6),  you can access the back up from any of the supported devices with one Samsung account. This means you can migrate old phone data to Galaxy S9 or S9 using Samsung cloud without using Smart Switch.

The only drawback is the storage is limited 15GB per account (NOT per device). In most regions, Samsung does not sell additional storage.… Read the rest

Filed Under: Galaxy S9 Guides Tagged With: back up, back up Galaxy S9, back up photos, Galaxy S9 always-on display (AOD), Galaxy S9 home screen, Galaxy S9 lock screen, Galaxy S9 settings, Gallery app, Google Drive, Google photos, migrate to Galaxy S9, Samsung account, Samsung Cloud, smart switch

How to show photos on Galaxy S9 Home screen?

You can use the picture frame widget to show photos on Galaxy S9and S9+ home screens.

simon · Leave a Comment

How to show photos on Galaxy S9 Home screen?Many Galaxy S9 or S9+ owners want to show photos on Galaxy S9 Home screen so that they can easily see the slideshow of their loved photos without opening the Gallery or other photo apps.

Samsung made it easy to pin photos to the always-on display as explained in this guide. But showing photos on Galaxy S9 Home screen does not work out of the box.

Although there are many solutions for you to show photos on Galaxy S9 Home screen, using Samsung’s picture frame widget probably is the easiest way to show photos on Galaxy S9 and S9+ home screen.

This Galaxy S9 guide shows you how to show photos on Galaxy S9 home screen using the picture frame widget provided by Samsung.  You can also tweak the slideshow by including or excluding photos, adjusting slideshow timing, the layout of photos, and how the photos fill the spots.

The picture frame widget was available in Galaxy phones with Android Marshmallow 6.0 or earlier. Samsung removed it in Android Nougat firmware and offered it as an optional feature in Galaxy Apps.

So, this guide applies to most Samsung Galaxy phones. For Galaxy S9 and S9+, you need to install the widget from Galaxy Apps.

You may follow the steps to install the widget and show photos on Galaxy S9 Home screen. Ths steps als0 are applicable for Galaxy S8, S8+, S7, S7 Edge, Note 9,  Note 8 and Note 5. If you have an older Samsung phone, very likely, you can skip step 1 (as the widget was part of the old Gallery app).

Step 1: Install Picture Frame from Samsung Galaxy Apps

Galaxy Apps is preinstalled in Galaxy S9 and S9+. You cannot remove it.

Samsung now puts many optional features on Galaxy Apps.

In Galaxy  S9 or S9+,  tap Galaxy Apps icon in the home screen or apps screen.

In Galaxy Apps, switch to Exclusives tap as shown below.

show photos on Galaxy S9 Home screen Step 1: Install Picture Frame from Samsung Galaxy Apps show photos on Galaxy S9 Home screen Step 1: Install Picture Frame from Samsung Galaxy Apps

In the Exclusives tab, you can scroll down to find the Galaxy Essentials category.

Tap view all as shown above.

Now, you can find apps included in Galaxy Essentials as shown below.

In some regions, by default,  there is a Galaxy Essentials widget on Galaxy S9 Home screen. You can tap it to arrive on the same page.

Among the apps, you can find the Picture frame as shown below. It used … Read the rest

Filed Under: Galaxy S9 Guides Tagged With: Galaxy apps, Galaxy S9 always-on display (AOD), Galaxy S9 home screen, galaxy S9 home screen edit mode, Galaxy S9 touch screen gesture, Galaxy S9 widgets, Gallery app, long tap gesture, picture frame, pinch gesture, show photos on Galaxy S9 home screen, wallpapers

How to use Galaxy S9 dual messenger to run two accounts of messenger apps simultaneously on Galaxy S9 and S9+?

You can simultaneously use two (or even three) accounts for WhatsApp, Facebook, WeChat, Facebook Messenger, Telegrams and other messenger apps with Galaxy S9 dual messenger feature

simon · 6 Comments

use Galaxy S9 dual messenger to run two accounts of messenger apps simultaneously on Galaxy S9 and S9+Galaxy S9 dual messenger makes it possible to have two accounts of the supported messenger apps (e.g., WhatsApp, Facebook Messenger, WeChat, Telegram, Viber…) and Facebook accounts in Galaxy S9 and S9+.

You can use these two messenger accounts simultaneously on Galaxy S9 or S9+.

Galaxy S9 dual messenger works on all Galaxy S9 and S9+ phones. It does NOT require the dual-SIM version of Galaxy S9 or S9+.

Dual messenger was first introduced in Galaxy S8. You can use the identical dual messenger feature on Galaxy S8, S8+, S9, S9+, Note 8 and Note 9.

This guide shows you how to use Galaxy S9 dual messenger to enable two accounts of messenger apps on Galaxy S9 and S9+. It also shows you how to disable individual messenger apps on Galaxy S9 dual messenger.

Why may you need to have two accounts of WhatsApp and other messenger apps in Galaxy S9 and S9+?

Many Galaxy S9 or S9+ owners may have different social profiles when they are in office, and when they are at home.

You may never want to mess up your personal WhatsApp or Facebook account with the account for work.

Some owners may want to show themselves differently in social media to buddies and to parents or teachers or supervisors.

Many Android apps support multiple profiles. For example, you can add multiple Google accounts to Galaxy S9. In Google+, you can quickly switch to different profiles.

But some apps limit one account on one device.

WhatsApp has been notoriously enforcing this policy since day 1. Facebook also requires you to sign out if you want to switch the account on the same phone.

But with more and more Galaxy S9 and S9+ owners use two SIM cards on the phone, there is a genuine need for running two messenger accounts concurrently on the phone.

Anyway, two or more WhatsApp (and other messenger apps) accounts can make your life easier by separating different aspects of your daily life.

How does Galaxy S9 dual messenger work?

Samsung initially tried to solve the work-life separation issue with the secure folder, which is a Knox-based container (like a small virtual machine, but not full Knox), in Galaxy S7 and S7 edge.

Secure folder works well in creating two spaces in one phone. But most owners do not use this feature because it is not so convenient. You … Read the rest

Filed Under: Galaxy S9 Guides Tagged With: app pair, dual messenger, dual-SIM, Galaxy S9 apps screen, Galaxy S9 edge screen, Galaxy S9 home screen, Galaxy S9 settings, Galaxy S9 touch screen gesture, Multi Window, Samsung Knox, secure folder, two SIM cards, WhatsApp

How to use Galaxy S9 themes to customize the look and feel of Galaxy S9 and S9+?

Everything you need to know about Galaxy S9 themes

simon · Leave a Comment

Everything you need to know about Galaxy S9 themesGalaxy S9 themes allow you to customise many aspects of the UI in Galaxy S9 and S9+.  It is no longer necessary to customise the colour scheme, wallpaper, icons or always-on display (AOD) screen individually.

You can find many excellent free Galaxy S9 themes in Samsung themes to meet your needs.

This Galaxy S9 guide explains everything you need to know about Galaxy S9 themes: What are they? How to get them? How to access them in Samsung themes? How to install and use them? How to manage or delete Galaxy S9 themes.

What are Galaxy S9 themes?

Galaxy S9 themes are “skins” for your Galaxy S9 and S9+.

You can use Galaxy S9 themes to customise the user interface of Galaxy S9 or S9+. The customisation usually includes:

  • Colour scheme for the UI. The default white scheme in Galaxy S9 and S9 UI can be annoying when you are using the phone in darkness.
  • Wallpapers for Galaxy S9 Home screen (including Galaxy S9 Apps screen), Galaxy S9 edge screen,  and Galaxu S9 lock screen.
  • App icon pack for pre-installed Samsung apps to replace the stock icon.
  • Font, style and background settings for Settings, Phone, Messages, Internet, Contacts, Clock, My Files and a few (about 30 to 40) other Samsung system apps.
  • Galaxy S9 always on display (AOD) themes.

Please note, Galaxy S9 themes work with the default launcher. If you are using a third-party launcher, Galaxy S9 themes unlikely will work as expected.

Besides, themes for other Galaxy phones (e.g., Galaxy S8/S8+) will NOT work on Galaxy S9/S9+.

Where to get Galaxy S9 themes?

As a security measure, you should get new themes for Galaxy S9 and S9+ ONLY from Samsung’s Theme store, which is embedded in Galaxy Apps.

You probably should never get any themes from other sources.

How to access Galaxy S9 themes?

You can access Galaxy S9 themes from Galaxy S9 Home screen edit mode.

In Galaxy S9 home screen, you can enter the edit mode by:

  • Pinch gesture.
  • Long tap (tap and hold) on any blank area.

Once in the edit mode of the Galaxy S9 Home screen, as shown below,  tap Themes to access Galaxy S9 themes.

access Galaxy S9 themes access Galaxy S9 themes

In Galaxy S9 themes page, as shown in the screenshot above, tap Themes to enter themes tab.

Besides, you will get the notification about Galaxy S9 themes in the notification panel when … Read the rest

Filed Under: Galaxy S9 Guides Tagged With: Galaxy S9 always-on display (AOD), Galaxy S9 apps screen, Galaxy S9 clear view cover, Galaxy S9 clear view standing cover, Galaxy S9 home screen, galaxy S9 home screen edit mode, Galaxy S9 LED wallet cover, Galaxy S9 lock screen, Galaxy S9 notification panel, Galaxy S9 quick settings panel, Galaxy S9 themes, Galaxy S9 touch screen gesture, icon pack, quick setting buttons, Samsung themes, screenshot, wallpapers

How to use Galaxy S9 Apps screen on Galaxy S9 and S9+?

Everything you need to know about Galaxy S9 Apps screen

simon · Leave a Comment

use Galaxy S9 Apps screen on Galaxy S9 and S9+Galaxy S9 Apps screen is an integral part of Galaxy S9 and S9+. Unless you hide the apps screen, you have to work with it.

Although Galaxy S9 apps screen is just a special version home screen, there are some major differences between Galaxy S9 Home screen and Apps screen.

This Galaxy S9 guide explains what Galaxy S9 apps screen is, how to access it, how to use it and how to manage apps and app folders on it.

What is Galaxy S9 Apps screen?

Galaxy S9 Apps screen is the placeholder for all apps installed on your phone. All other Android phones also have a similar apps screen.

Sometimes, apps screen is referred to as the app drawer. In the old versions of Android, widgets were normally hosted in the apps screen as well.

Galaxy S9 Apps screen actually is a special version of Galaxy S9 Home screen.

You can find apps, hide apps, sort apps, manage apps in Galaxy S9 apps screen.

By default, all apps will be listed in the apps screen unless you hide them.

How to access Galaxy S9 Apps screen?

By default, there are a couple of different ways to access Galaxy S9 Apps screen.  These include:

  • Use the apps screen button (apps button) in the favourite apps tray of Galaxy S9 Home screen, if you did not hide apps screen button on Galaxy S9 or S9+.
  • Swipe upwards on Galaxy S9 Home screen.
  • Swipe downwards on Galaxy S9 Home screen, if you did not enable quick-open notification panel.

Of course, if you hide the Galaxy S9 Apps screen, then you are working with Galaxy S9 Home screen only, and the apps screen will not be explicitly available.

How to use  Galaxy S9 Apps screen interface?

On Galaxy S9 apps screen, if you tap on any app icons, the app will start. This is similar to that on the home screen.

If you tap and hold (long tap) an app icon without moving your fingers, you will get the context menu as shown in the following two screenshots.

For all apps, there are at least 3 options in the context menu:

  • Select items. You can then continue to select more app icons in the selection mode. You can use the selected apps to create an app folder. Or you can uninstall them in batch.
  • Add to home
… Read the rest

Filed Under: Galaxy S9 Guides Tagged With: app finder, app folders, app shortcut, apps icon grid, Galaxy S9 apps screen, Galaxy S9 home screen, galaxy S9 home screen edit mode, Galaxy S9 home screen landscape mode, Galaxy S9 settings, Galaxy S9 touch screen gesture, hide apps screen, hide Galaxy S9 apps button, landscape mode, long tap gesture, sort apps

How to manage Galaxy S9 Home screen panels on Galaxy S9 and S9+?

Add, delete, re-arrange Galaxy S9 home screen panels and assign a new home panel for Galaxy S9 Home screen

simon · Leave a Comment

manage Galaxy S9 Home screen panels on Galaxy S9 and S9+Like other Android phones, Galaxy S9 and S9+ use some Galaxy S9 home screen panels to host apps, app shortcuts, app folders and widgets.

You can add, delete, move, and re-arrange Galaxy S9 home screen panels based on your needs. You can also assign one panel as the home panel for Galaxy S9 Home screen.

This Galaxy S9 guide shows you how to work with and manage Galaxy S9 home screen panels.

What are the Galaxy S9 Home screen panels?

Galaxy S9 Home screen, by default, has at least two pages with Bixby Home (you may hide it) on the leftmost and a “home” page, which you access by tap the Home button.

These pages are usually referred to as Galaxy S9 Home screen panels.

As you may know, you can use more Galaxy S9 Home screen panels to accommodate more app icons, app folders, widgets, app shortcuts and file shortcuts on Galaxy S9 Home screen.

You can also show photos on Galaxy S9 home screen as explained in this guide.

Besides, if you hide apps screen on Galaxy S9 and S9+, more panes will be added automatically so that all apps are added to the Home screen.

How to assign a panel as the home panel for Galaxy S9 Home screen?

Among Galaxy S9 Home screen panels, one and only one panel is always the “home” panel for Galaxy S9 Home screen. When you tap the home button once or twice, you will be directed to this specific panel.

For example, you open an app from one of the home screen panels.  If you tap the home button once, you will be brought back to the panel you started the app.

If you tap the home button again, the system should bring you back to the home panel.

By default, the panel next to Bixby Home is assigned as the home panel for Galaxy S9 Home screen.

Of course, you can change the home panel and assign any of the Galaxy S9 home screen panels as the home panel.

To assign a new home panel for Galaxy S9 Home screen, you may follow these steps.

Step 1: Enter Edit mode of Galaxy S9 Home screen

You can tap and hold (long tap) any blank area in Galaxy S9 Home screen to enter the edit mode for Galaxy S9 Home screen… Read the rest

Filed Under: Galaxy S9 Guides Tagged With: Bixby Home, Galaxy S9 apps screen, Galaxy S9 Home button, Galaxy S9 home screen, galaxy S9 home screen edit mode, Galaxy S9 Home screen panel, Galaxy S9 touch screen gesture, hide Galaxy S9 apps screen, home panel

  • Go to page 1
  • Go to page 2
  • Go to Next Page »

Primary Sidebar

RSS Samsung Galaxy S21 Guides

  • Top 12 new features in Android 12 update for Galaxy S21, S20 and S10
  • Android 12 update vs One UI 4.0 vs One UI 4.1: update Galaxy S21, S20 and S10 to Android 12
  • How to set and resize photo size on Samsung Galaxy S21, S20, S10, and S9 without using any third-party apps?
  • How to Customize Galaxy S21 Home Screen?
  • Master Galaxy S21 Lock Screen Settings
  • How to use widgets on Galaxy S21?
  • How to Use and Customize Galaxy S21 Side Key?
  • How to hide Galaxy S21 password and PIN when typing?
  • How to power on, power off, and reboot Galaxy S21,even when the phone hangs?
  • How to use Galaxy S21 quick settings panel?

RSS Galaxy S20 Guides

  • How to Use Enhanced Processing on Galaxy S20 with Android 11 update?
  • How to access, use, and customise widgets on Galaxy S20 lock screen and AOD screen with Android 11 update for Galaxy S20?
  • How to update Galaxy S20 to Android 11?
  • How to use Galaxy S20 lockdown mode?
  • Top 11 new features in Galaxy S20 Android 11 update
  • How to use Galaxy S20 recovery mode?
  • How to use 5 different shooting methods for Galaxy S20 camera?
  • How to use and customize power mode on Galaxy S20?
  • A Complete Guide Of Galaxy S20 Assistant Menu

RSS Galaxy Note Guides

  • Top 11 disappointments of Galaxy Note 20 and Galaxy Note 20 Ultra
  • How to use the Dynamic Lock screen on Galaxy Note 10?
  • Galaxy Note 10 LED View Cover Guide and Review
  • Install S Note app and Extension pack on Galaxy Note 10
  • How to Use Galaxy Note 10 Camera App?
  • Galaxy Note 10 SIM Card Guide
  • How to use Samsung DeX for PC with Galaxy Note 10 and Galaxy Note 10+?
  • How to use Galaxy Note 10 Clear View cover (S View cover)?
  • How to charge Galaxy Note 10 battery?
  • How to use and remap Galaxy Note 10 Side key?

RSS Drive In Singapore

  • Top 5 rules of driving in Singapore safely and legally during COVID-19 Circuit Breaker period
  • Understand COE Price by 10 Simple Questions
  • How to convert a foreign driving license to a Singapore driving license?
  • How to get a Touch ‘n Go card as a Singapore driver?
  • What is covered in the car warranty in Singapore? What is not?
  • What is the Singapore Road Speed Limit?
  • How to register, collect and use Malaysia Vehicle Entry Permit (VEP)?
  • Why are cars in Singapore are so expensive?
  • Drive to Malaysia
  • Car Maintenance and Servicing in Singapore

RSS Moto G Guides

  • Moto G8 vs Moto G8 Power vs Moto G8 Power Lite vs Moto G Power vs Moto G Stylus vs Moto G Pro vs Moto G fast: What are the differences?
  • Moto G8 User Manual for Moto G8 Plus and Moto G8 Play
  • Moto G8 Plus vs Moto G8 Play: Differences and common features
  • Official Moto G7 user manual

RSS Chromecast Guides

  • How to play games on Chromecast from mobile devices (Android and iOS)?
  • How to use Chromecast Audio multi-room group playback?
  • What are the 3 compatible audio cables for Chromecast Audio? and why it matters?
  • How to use Ethernet Adapter for Chromecast?

RSS Headphone Guide Pro

  • AirPods Pro 2 New features explained
  • What is Samsung Seamless Codec? 4 things you should know about this new codec
  • How to use widgets to check battery levels and control Galaxy Buds 2, Galaxy Buds Pro, Galaxy Buds Live, Galaxy Buds+, and Galaxy Buds?
  • AirPods 3 vs AirPods Pro: which one should you choose?
  • AirPods 3 vs AirPods 2: Top 8 improvements and new features of AirPods 3

© 2015–2023 · GadgetGuideOnline.com is an online community for Gadget Owners! · Hosted by PTRHosting
· Powered by Genesis framework for WordPress

Samsung Galaxy S9 how-to guides, user manuals and tutorials! Everything about Samsung Galaxy S9 and Galaxy S9+.
Disclaimer: Samsung, Galaxy, Galaxy S9, and Galaxy S9+ are trademarks of Samsung. Android is a trademark of Google. This website is NOT affiliated with Samsung or Google in any way. All the information provided on this website is provided on an "as is" and "as available" basis and you agree that you use such information entirely at your own risk.