Samsung added the help icon and histogram in the Pro camera mode in the Android 13 (One UI 5) update for Galaxy S22, S21, and S20.
This Galaxy S22 new features guide explains how the help icon and histogram may help many Galaxy S22 owners use the Pro camera mode, how to access the help icon, and how to interpret and use the histogram.
In addition to Galaxy S22, S21, and S20, this guide also applies to some other Galaxy phones (e.g., Galaxy A series) with the Android 13 (One UI 5) update.
Please note there is a new resolution button in the Pro mode if you have updated your Galaxy S22 to Android 14 (One UI 6).
Help icon and histogram for Pro camera mode in Android 13 (One UI 5) Update for Galaxy S22, S21, and S20
- How the help icon and histogram may help you use the Pro mode?
- How to access the help icon for the Pro mode on Galaxy S22, S21, and S20?
- How to use and interpret the histogram in the Pro mode?
How the help icon and histogram may help you use the Pro mode?
Pro mode (and Pro video mode) is the most powerful camera mode in Galaxy S22, S21, and S20. It offers DSLR-like controls for you to take high-quality pictures.
The “power” of total control of most aspects of the camera also overwhelms most users who were never trained in photography.
Most users cannot afford the time and effort needed to go through the details of the photography jargon and fundamentals.
So, some quick help info with a concise explanation for each option is definitely helpful for busy users.
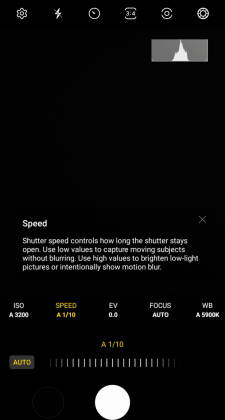
The help icon in the Pro mode (and Pro video mode) in the Android 13 (One UI) update filled this gap. When you try to change some settings, e.g., ISO, a help icon appears. You can tap the icon to see a brief explanation of the corresponding feature so that you get some idea of how it will affect the final photo.
The histogram is for a bit more advanced users. In a nutshell, the histogram can tell you whether the photo may suffer from overexposure or underexposure issues.
Of course, if you want to dig more, you need to find some in-depth text about photography. But for many users, the info may be enough to try the Pro mode.
Please note you cannot scan documents or extract text in the Pro mode.
How to access the help icon for the Pro mode on Galaxy S22, S21, and S20?
By default, the help icon in the Pro mode is hidden. You may follow these steps to access the help icon and the corresponding help text for the Pro mode.
Step 1: Open the Camera app
You can open the Camera app on Galaxy S22, S21, or S20 in different ways, including:
- Press the Side key (see Galaxy S22 layout) twice (if Camera Quick launch is not disabled).
- Tap the Camera app icon on the Home screen.
- Tap the Camera app icon on the Lock screen.
- Use voice commands (Google Assistant or Bixby).
- Use the camera widget if you have updated your Galaxy S23, S22, and S21 to Android 14 (One UI 6). You should try the new camera features in the One UI 6 update.
If you launch the Camera app without unlocking the phone, you can use the camera without changing the camera settings.
The default camera app interface (preview screen) on Galaxy S22, S21, and S20 is shown below.
Step 2: Switch to Pro mode
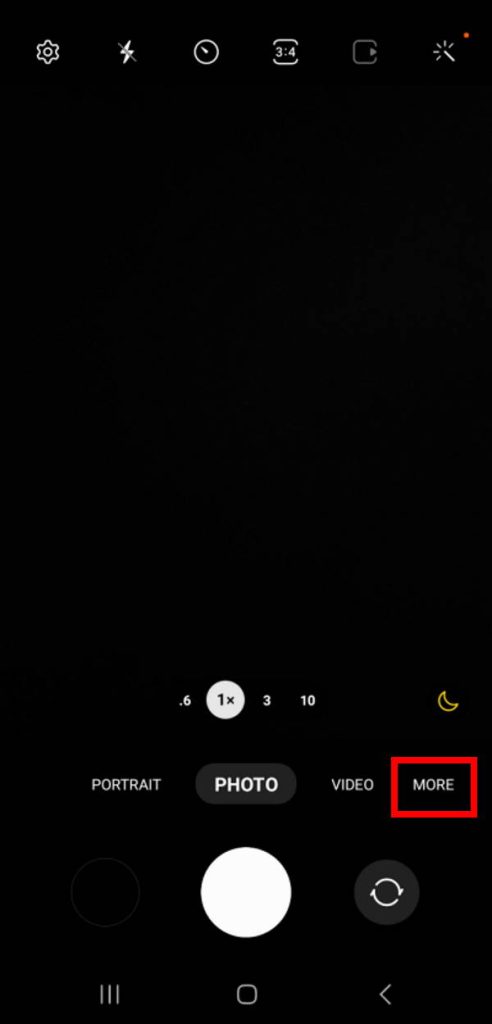
By default, the Pro mode is not shown on the interface. All other camera modes are placed on the More page.
If you need to use some modes (e.g., Pro mode, Portrait mode) frequently, you can add them to the interface so that you can access them quickly without navigating to the More page, as explained in this guide.
As shown in the screenshot below, tap More to access the Pro mode.
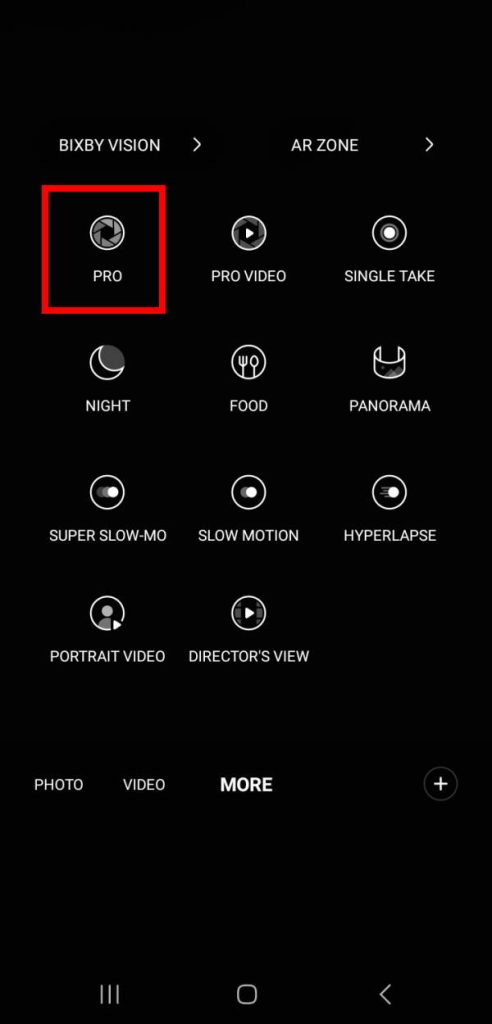
On the More page, as shown in the screenshot below, tap the Pro mode icon to switch to the Pro mode.
Step 3: Tap any of the photography settings
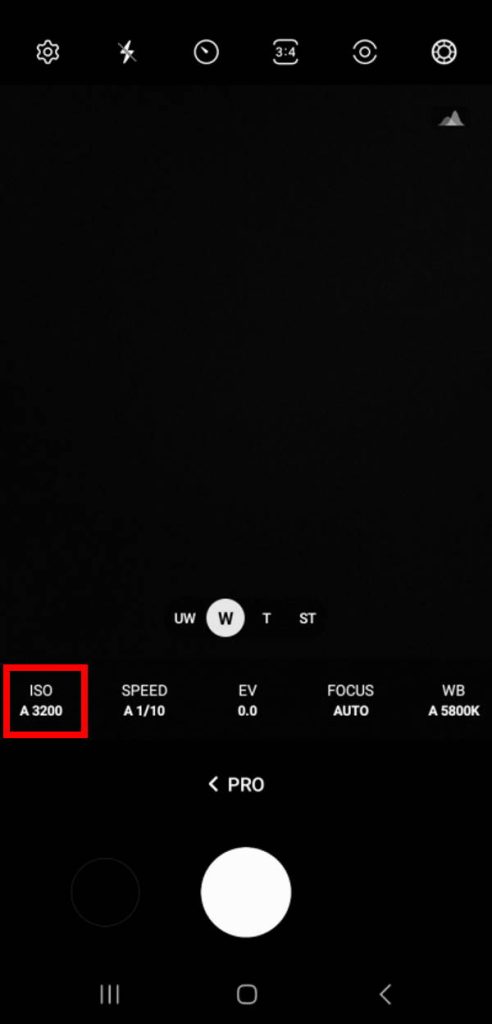
The Pro mode interface is relatively complicated compared to other camera modes, as shown in the screenshot below.
In the Pro mode, you can adjust the ISO, shutter speed, exposure, focus mode, and white balance. Please refer to this guide on how to adjust these settings in the Pro mode.
By default, the help icon is hidden, and the histogram is inactive.
The help icon is associated with different settings. So, you need to tap one of the options to reveal the corresponding help icon.
For example, you want to get some help on the ISO setting. So, tap the ISO button, as shown below.
Step 4: Tap the help icon
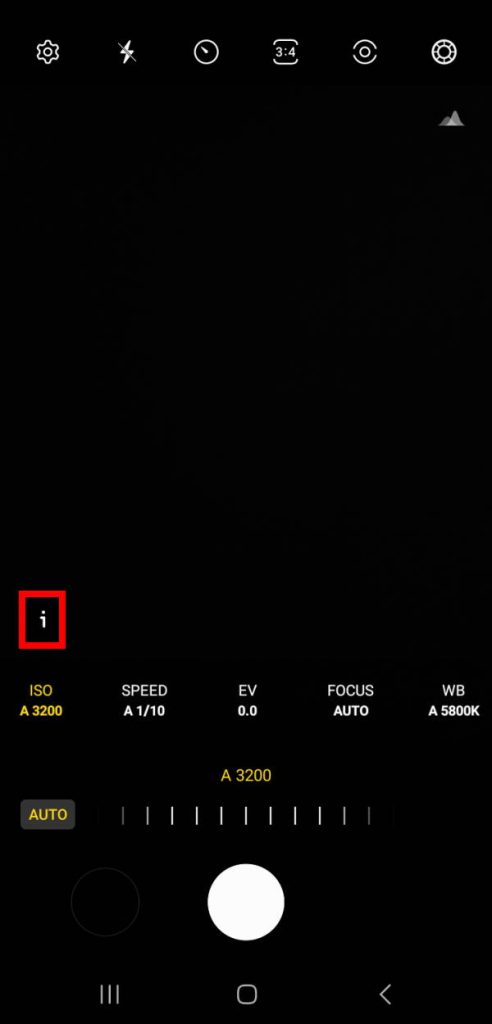
After tapping the ISO button, you are ready to change the ISO value.
At the same time, you will notice the help icon for ISO appears, as shown in the screenshot below,
You can tap the icon to get a brief description of the ISO value settings.
Step 5: Check the help text
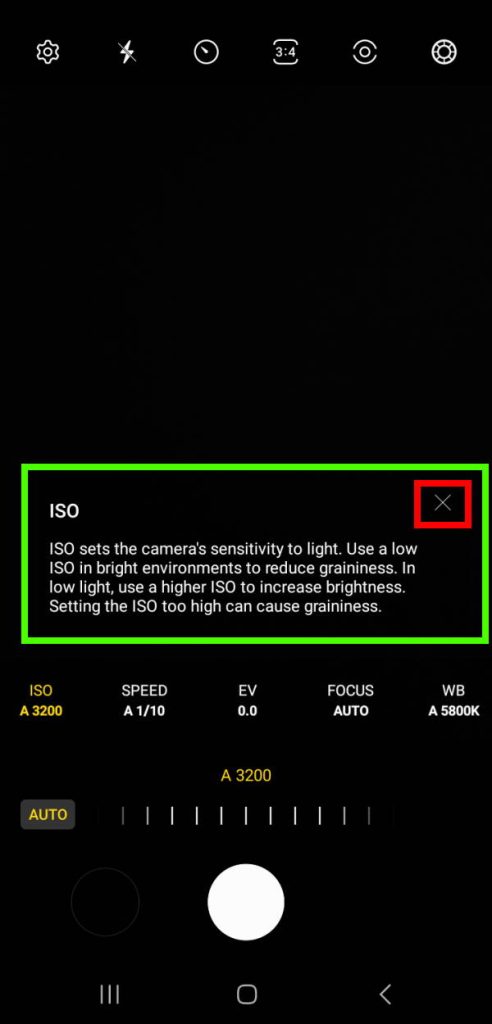
Now, the help icon expanded into a pop-up window with help text inside, as shown in the screenshot below.
The description is concise. But it may be helpful for many users.
Similarly, you can use the help icon to get explanations of other settings.
When the help text is shown, you can tap any other buttons to switch to the help text for that feature without using the help icon.
Step 6: Close the help text.
You can use the close (cross) icon to close the help text. You can also tap anywhere outside to close the help text.
How to use and interpret the histogram in the Pro mode?
The histogram is an advanced topic, even for professional photographers.
In layman’s terms, you can use the histogram to check whether the photo is overexposed or underexposed. But this depends on the focused object and surrounding conditions as well.
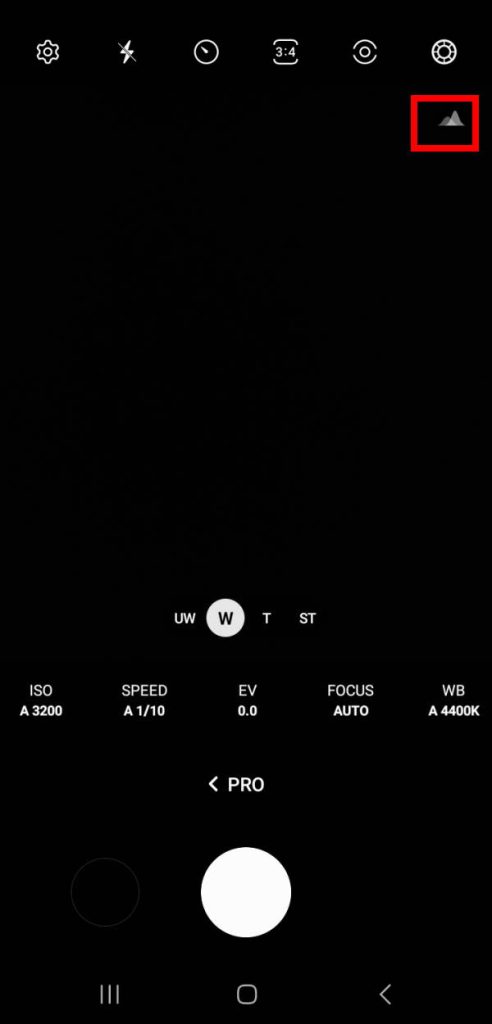
By default, the histogram is inactive, and an icon is shown on the preview screen, as shown in the screenshot below.
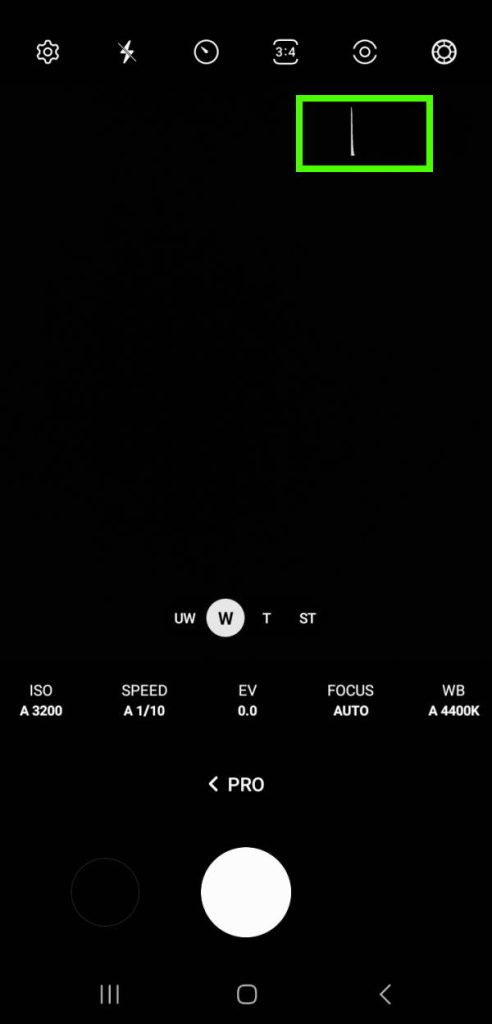
You can tap the icon to change the icon to a histogram, as shown in the screenshot below.
The histogram is floating over the preview screen. But you cannot relocate or change its size.
By default, the automatic settings try to balance the histogram with the peak near the center.
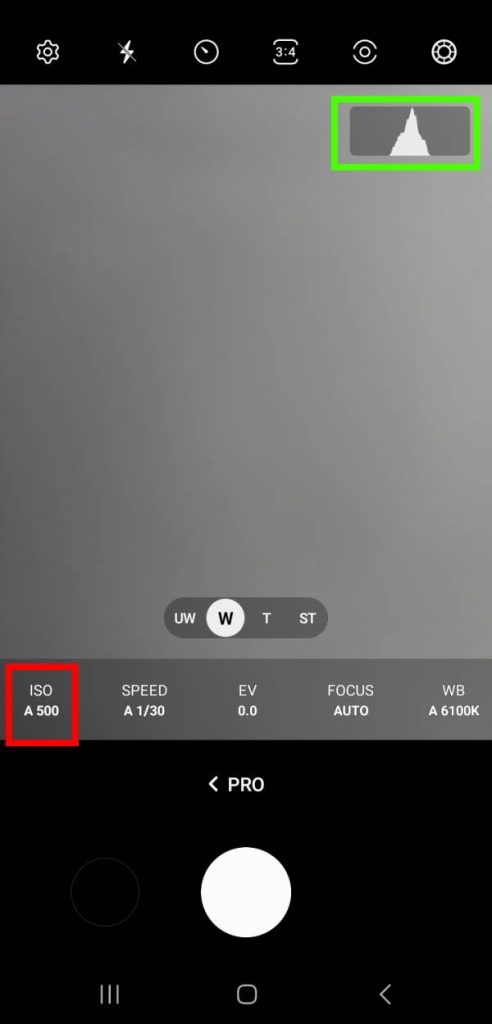
For example, in the following screenshot, ISO was set automatically at 500, and the histogram closely follows the normal distribution. The narrow range is due to the object in the preview screen.
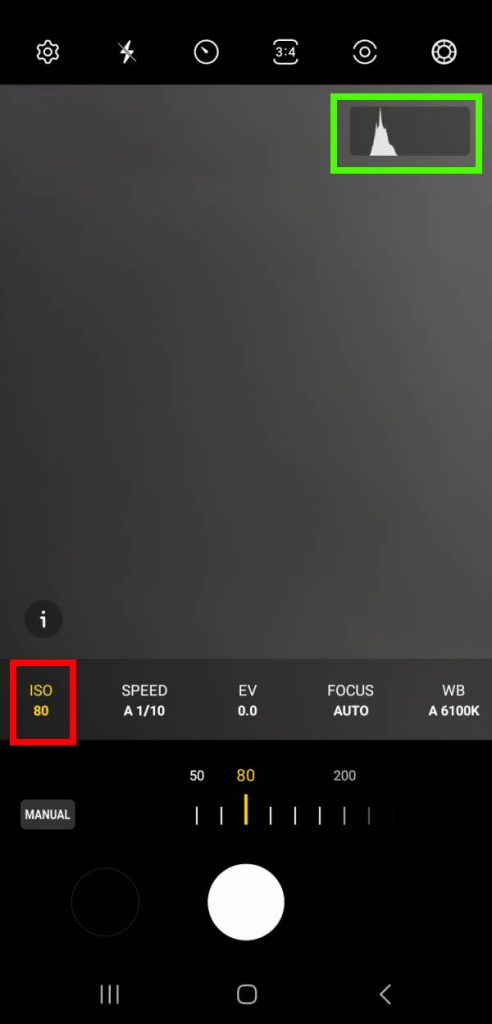
If I change the ISO to 80 (without changing the focus and other settings), the histogram shifts to the left side, as shown in the screenshot below.
When the histogram shifts to the left side, the photo may be underexposed. Of course, this does not mean the quality of the photo is not good because it depends on the object and surroundings and what you want to capture.
But generally, if the histogram is shifted too much to the left, the photo may be underexposed. If the histogram is shifted too much to the right, it usually means you need to check whether the photo is overexposed.
You may check some photography books to fully understand and experiment with the histogram.
Do you have any questions on the help icon and histogram for Pro camera mode in Android 13 (One UI 5) Update for Galaxy S22, S21, and S20?
If you have any questions about the help icon and histogram for Pro camera mode in Android 13 (One UI 5) Update for Galaxy S22, S21, and S20, please let us know in the comment box below.
The community will help you.
You may check other Galaxy S22 guides:
- Galaxy S22 new features guides, including Android 13 (One UI 5.0 and One UI 5.1) update and Android 14 (One UI 6) update.
- Galaxy S22 how-to guides.
- Galaxy S22 camera guides.
- Galaxy S22 accessories guide.
- Official Galaxy S22 user manuals (in PDF).
If you want to discuss any issues privately, you can reach us through:
- Facebook page.
- WhatsApp (coming soon).
- Contact form.
Please do not forget to subscribe to our newsletter to get the latest updates, guides, tips, and tricks for Galaxy S22, S22+, and S22 Ultra.





Leave a Reply