
The camera widget is a new feature introduced in the Android 14 update (One UI 6) for Galaxy S23, S22, and S21 to help you launch the camera in the desired camera mode instantly.
This Galaxy S23 how-to guide explains what the camera widget is, how to add the camera widgets to the Home screen, and how to configure and customize the camera widget.
As the camera widget is a universal feature in One UI 6 (Android 14), this guide applies to all Samsung Galaxy phones with Android 14 (One UI 6), not limited to Galaxy S23, Galaxy S22, and Galaxy S21. For example, some Galaxy Z, A and M series phones will also be updated to Android 14.
Table of Contents
- What is the camera widget in One UI 6 (Android 14 update)?
- How to add and configure the camera widget in One UI 6 (Android 14 update)?
- How to manage the camera widget on Galaxy S23, S22, and S21?
What is the camera widget in One UI 6 (Android 14 update)?
The Galaxy S23, S22, and S21 smartphones boast an exceptional camera system. However, many Galaxy S23, S22, and S21 users are often unaware of the full potential of the advanced camera system in their smartphones.
While the default Photo mode is convenient, it only scratches the surface of what the camera can do. In addition to the default Photo mode, several other special camera modes offer unique features and functionality. For example, the Portrait mode is capable of taking impressive Bokeh photos with just a single tap, rivaling the output of high-end DSLR cameras. On the other hand, the Pro mode offers a wide range of advanced controls to users who possess some photography knowledge, enabling them to take their photography skills to the next level.
One of the major causes of this under-use problem is that many users just want to tap the shutter button without navigating through the interface to find the desired mode. Camera quick launch with the Side key only helps when you want to launch the camera app, not the desired camera mode, quickly. Camera Assistant only adds more features and does not offer solutions to this.
The camera widget in One UI 6 (Android 14) update on Galaxy phones tries to address this issue.
Instead of using the camera app and then fiddling around to find the desired camera mode, you can use the camera widget to launch the camera app directly in that specific camera mode.
For example, you can add multiple camera widgets to the Home screen, each with a different camera mode that you use often. Next time, you can tap the widget to open the camera app directly in the specific mode.
The camera widget also allows you to configure the front or rear camera. For example, if you take a lot of selfies with the front-facing camera in the Portrait mode, you can add a camera widget configured with the front camera and Portrait mode. So whenever you tap the widget, the camera is ready for your selfie.
In a nutshell, a camera widget allows you to:
- Configure it with any available camera mode.
- Configure it with the front or rear camera.
- Add multiple widgets with different configurations to the Home screen.
Some other new camera features in the One UI 6 (Android 14) update are explained here.
How to add and configure the camera widget in One UI 6 (Android 14 update)?
After updating your Galaxy S23, S22, or S21 to Android 14 (One UI 6), you can add the camera widget to the Home screen, just like adding other widgets (e.g., battery widget, Gallery widget). If you have updated your Galaxy S23 to One UI 6.1, you can even add Mode widget.
You may follow these steps to add the camera widget to the Home screen.
Step 1: Enter Home screen edit mode
On the Home screen, tap and hold on any blank area, as shown in the screenshot below, to enter the Edit mode of the Home screen so that you can customize it.

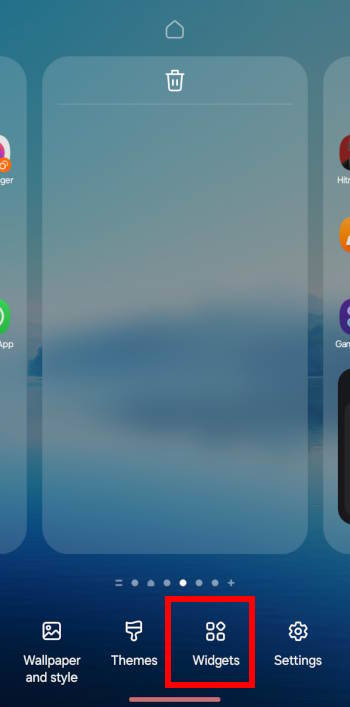
As shown in the screenshot above, in the Edit mode, you can customize the Home screen, including:
- Set wallpaper and style.
- Set or change the theme for the Home screen.
- Add widgets to the Home screen.
- Access Home screen settings.
Tap Widgets as we want to add widgets to the Home screen.
Step2: Choose widgets
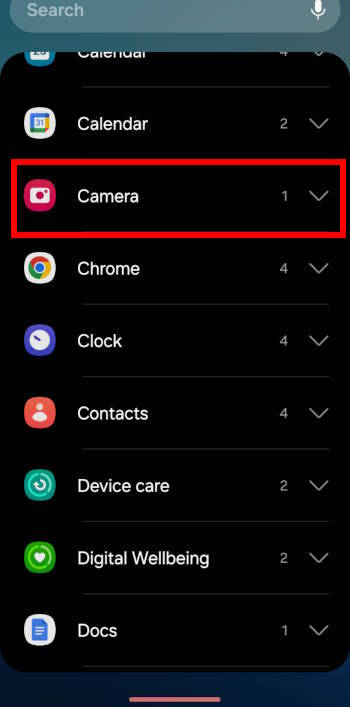
The available widgets are organized under the parent apps on the Widget screen.
In this case, the camera widget is provided by the Camera app. As shown in the screenshot below, the camera app offers only one (1) widget, indicated by the number right to it.
Tap Camera to preview the widget.
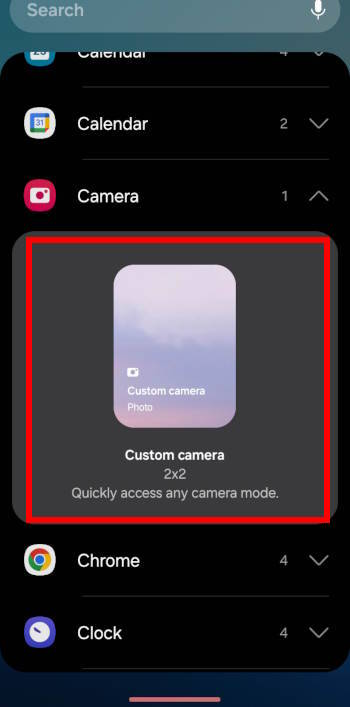
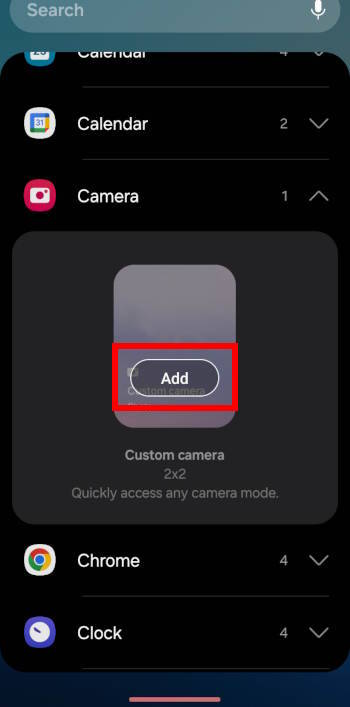
As shown in the screenshot above, the widget is 2×2 in size, and its function is for you to access any camera mode quickly.
You actually have two options here:
- Tap the widget preview. The widget will be added automatically to the Home screen. You may need to relocate it. With the Android 14 (One UI 6) update, you can use two hands to relocate widgets.
- Tap and Hold the widget preview. You need to drag the widget to the Home screen.
In this post, we use the first option.
After taping the widget preview, you can see the Add button, as shown in the screenshot below.
Step 3: Configure the camera widget
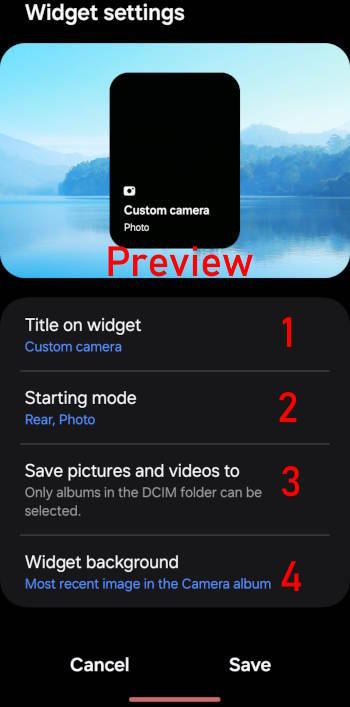
After tapping the Add button, you need to configure the widget before adding it to the Home screen.
As shown in the screenshot above, you can configure and customize the widget:
- Title on the widget (aka the name of the widget).
- Starting mode. You choose which camera and which camera mode to start when you tap on the widget.
- Save pictures and videos to. If you want, you can choose a dedicated album to save photos taken with this widget.
- Widget background. You can choose the background image for the widget.
The preview window updates in real time when you change the configurations.
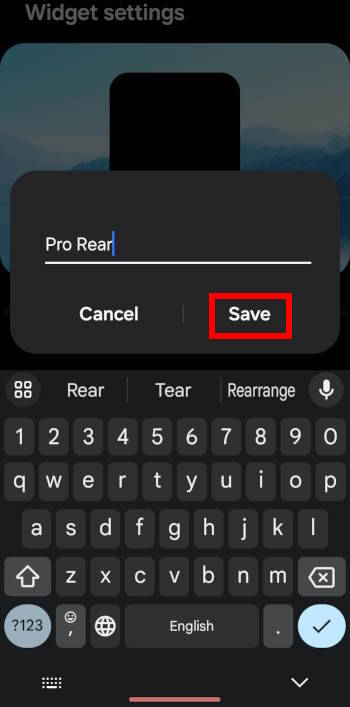
For example, you can give the widget a meaningful name.
As shown below, after tapping the Ttitle on widget (marked as 1 in the screenshot above), you can then give it a new name, as shown below.
Tap Save to save the customization, as shown in the screenshot below, after you finish the new name.
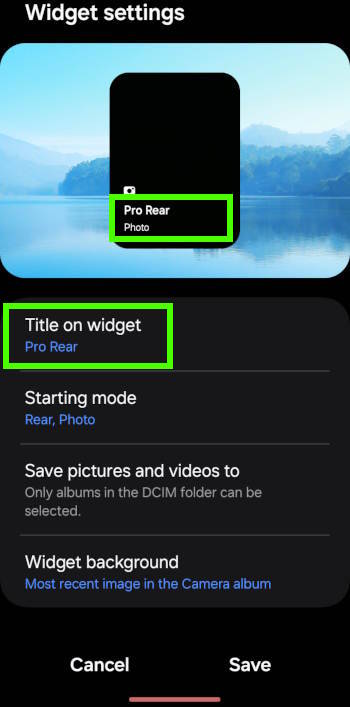
In the preview window, as shown above, the name (title) of the widget is updated accordingly.
Similarly, you can configure the camera and mode (marked as 2).
As shown in the screenshot below, you can choose which camera, front or rear, and which camera mode are used in this widget.
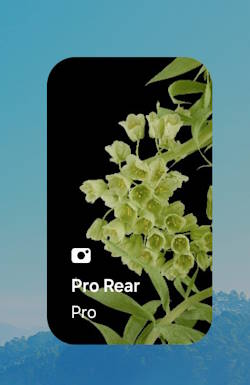
For example, I chose the rear camera and Pro mode in this case.
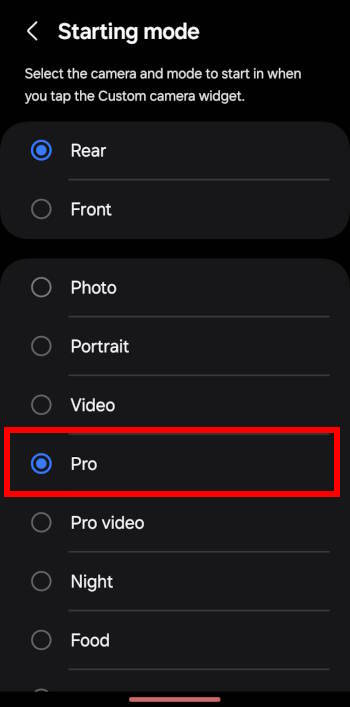
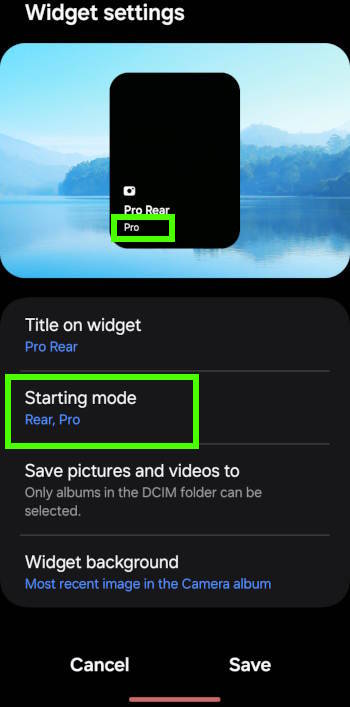
The camera mode is updated in the preview window, as shown in the screenshot above. But it did not add the word “rear”.
This is normal. If no camera is mentioned below the title, then it means it is the rear camera.
If you choose the front camera and Pro mode, it will show as Pro | Front.
By default, all photos are saved in the camera roll. If you want, you can specify an album for this widget. Photos taken with this widget will be saved to this album automatically. Of course, you can check all photos in the Gallery app.
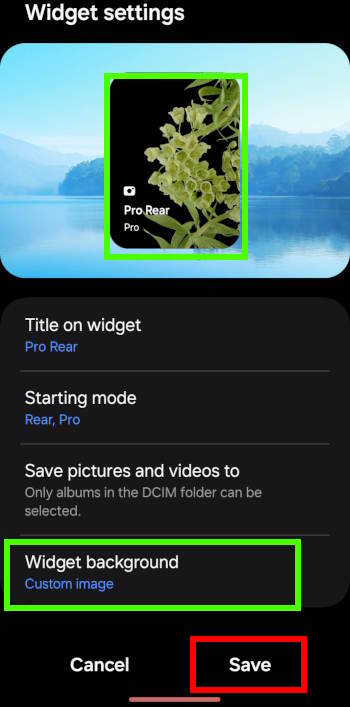
Lastly, you can also customize the background of the camera widget.
By default, the most recent photo will be used as the background. You can choose any photos/pictures on the phone as the background.
For example, as shown in the screenshot below, I selected an image as the background for the widget. The widget background changed to a Custom image. At the same time, the new background is used in the preview window.
Remember to tap Save, as shown below, to apply the configuration and customization.

Step 4: Resize and reposition the widget
After tapping the Save button, the widget will be added to the Home screen.
As shown in the screenshot above, you can reposition it to any location on the Home screen.
By default, the camera widget is a 2×2 widget, occupying 2 columns and 2 rows. You can use the handle to resize it to 2 columns and 1 row. You cannot resize it to 1×1.
If you need other configurations, you can repeat the process and add another widget. There is no limit to the number of camera widgets you can add to the Home screen.
To use the camera widget, just tap on it. The camera app will be launched. The pre-defined camera and camera mode will be activated automatically. You are ready to use it immediately.
How to manage the camera widget on Galaxy S23, S22, and S21?
Just like other widgets (e.g., battery widget), you can:
- Relocate the widget.
- Resize the widget to 2×1.
- Stack other widgets over it.
- Remove the widget.
- Change the configurations of the widget.
To manage the camera widget, tap and hold on the widget, as shown below.
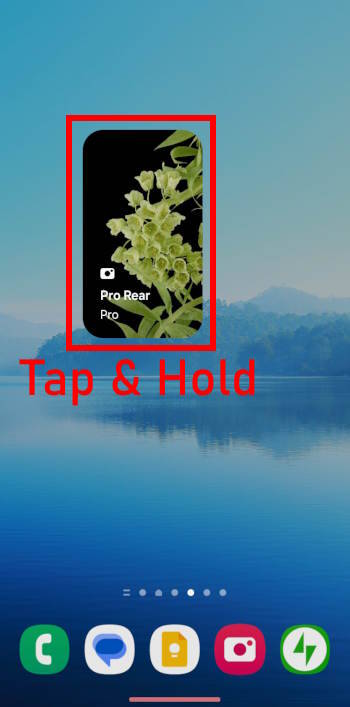
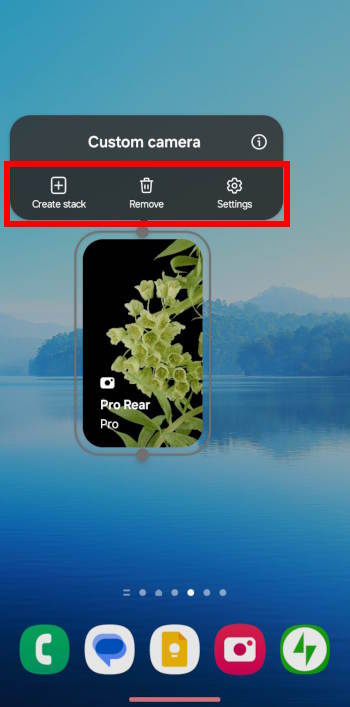
Now, you can relocate the widget by dragging it to a new location.
You can use the widget options to Create stack. Simply choose one or more widgets to share the location. Please refer to this guide on how to use Stack widgets feature on Galaxy S23, S22, and S21.
If you tap the Settings in the widget options, you can re-configure all 4 aspects of the widget, as explained earlier.
Do you have any questions about the camera widget on Galaxy S23, S22, and S21 with One UI 6 (Android 14)?
Please let us know in the comment box below if you have any questions about the camera widget on Galaxy S23, S22, and S21 with One UI 6 (Android 14).
The community will help you.
![Spigen Thin Fit Designed for Galaxy S23 Ultra Case (2023) [Military-Grade Protection] - Black](https://m.media-amazon.com/images/I/41i1xrzj2oL._SL160_.jpg)


![SAMSUNG Galaxy Buds2 Pro True Wireless Bluetooth Earbuds, Graphite, Hi-Fi Sound, 360 Audio, Active Noise Cancelling, Comfort Fit, HD Voice, IPX7 Water Resistant [US Version, 1Yr Manufacturer Warranty]](https://m.media-amazon.com/images/I/21Y3xVnL0BL._SL160_.jpg)
You may check other Galaxy S23 guides organized in the following 4 sections.
- Galaxy S23 new features guides. Galaxy S23 new features guides explain the new features of Galaxy S23 and show you how to use them. New features in the One UI 6 (Android 14) update are also covered in this section.
- Galaxy S23 how-to guides. Galaxy S23 how-to guides show you how to use and customize Galaxy S23, S23+, and S23 Ultra to meet your needs.
- Galaxy S23 camera guides. Galaxy S23 camera guides show you how to use Galaxy S23 camera features to shoot the best photos and videos with the top-notch camera system in Galaxy S23, S23+, and S23 Ultra. The new camera features in the One UI 6 (Android 14) update are also covered.
- Galaxy S23 accessories guides. Galaxy S23 accessories guides explore useful Galaxy S23 accessories and show you how to use them to protect your phone or increase your productivity (or fun).
Besides, you can read and download (in PDF format) the official Galaxy S23 user manual (including the updated Galaxy S23 user manual for Android 14 (One UI 6).
In addition to the comment box below, you can also reach us through the following channels:
Do not forget to subscribe to our newsletter to get the latest Tips and tricks on Galaxy S23.
Subscribe to our newsletter!
Enjoy your Galaxy S23!
