
One-tap editing in Android 14 (One UI 6) allows you to quickly edit photos while viewing them in the Gallery app without switching to the Photo Editor.
This Android 14 (One UI 6) new features guide explains the functions and features of one-tap editing in One UI 6 and how to use the one-tap editing to create a 24-hr time-lapse video (scene relighting), remaster the photo, remove objects (object eraser), and apply portrait effects.
You can enjoy this new feature on your Galaxy S23, S22, and S21 after updating them to the Android 14 (One UI 6). This guide also applies to all other Galaxy devices that have been updated to Android 14.
One UI 6.1 update adds more AI recommendations for the one-tap editing, e.g., star trails, long exposure, and colorizing. You may check the 44 new features introduced in the One UI 6.1 update for Galaxy S23, Galaxy Z Fold 5, Galaxy Z Flip 5, and Galaxy Tab S9.
Table of contents
What is One-tap editing in the Android 14 (One UI 6) update?
Gallery app is normally for you to view your photos. For example, there is a thumbnail in the camera app showing you the last photo. It is also a shortcut to the Gallery app so that you can check all photos. You can also use the Gallery widget to show photos on the Home screen.
To edit a photo from the Gallery app, you normally have to tap the Edit button to navigate to the Photo Editor.
In the Android 14 (One UI 6) update, Samsung added the One-tap editing feature so that you can perform some quick edits while viewing the photo in the Gallery app.
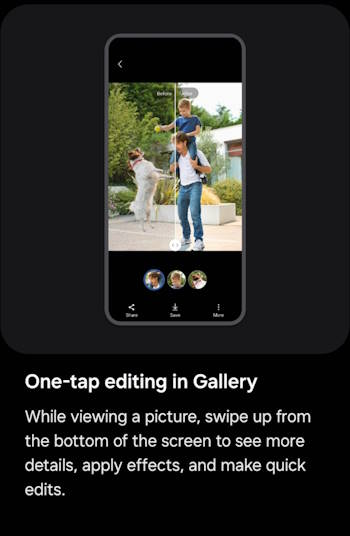
While viewing a picture or video, you can swipe up from the bottom of the screen to go to detail view. This detail view screen now provides quick access to effects and editing features you can immediately apply. It is not necessary to navigate to the Photo Editor.
Of course, only some of the editing features are available through One-tap editing. You need to enter Photo Editor (tap the Edit/Pencil icon) if more tools are needed for your edit.
Currently, One-tap editing offers the following 4 AI-based editing tools, depending on the photo:
- Create a 24-hr time-lapse video (using Scene Relighting).
- Remaster the photo.
- Remove an object (Object eraser).
- Apply portrait effect.
In short, the One-tap editing offers quick edits for you in the Gallery app without launching the Photo Editor.
How to use One-tap editing to quickly edit photos in the Gallery app with Android 14 (One UI 6) update?
To use One-tap edit, you just need to swipe up when viewing the photo, as shown in the screenshot below.
This should reveal some details of the photo.

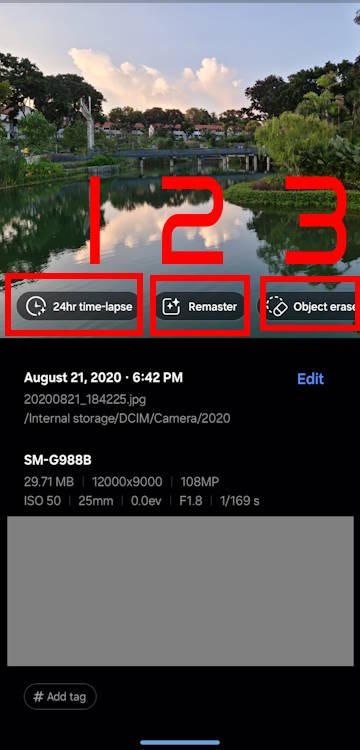
In the detail view, as shown above, you can find the time taken, storage location, camera sensor info, location, and tags of the photo.
At the same time, the phone will use AI to analyze the photo and give you one-tap editing suggestions, which depend on the photo.
As mentioned, you will normally get up to 4 different editing suggestions.
1. 24-hr time-lapse video (scene relighting)
For example, for the landscape photo with the sky and ground shown above, you can create a 24-hour time-lapse video using Scene Relighting.
You just need to tap the 24hr time-lapse button, as shown in the screenshot above and the phone will do the rest.
After a few seconds, a 12-second time-lapse video with music will be created automatically. This is exactly what Scene Relighting does, as explained in this guide.
You can choose to save the video if it looks OK.
Please note the video is always 12 seconds long and has royalty-free music chosen by AI. It has the same limitations as Scene Relighting. You can edit the video later (e.g., in the Studio) if you want to change the video or music.

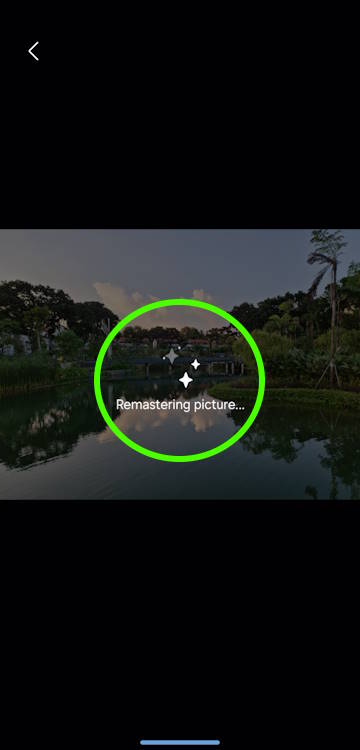
2. Remaster
Remaster is available for all photos in One-tap editing unless the photo has been remastered already.
Although it is not a new feature in One UI 6 (e.g., it works well in One UI 5), remastering can instantly and automatically improve the overall photo quality. Based on AI analysis of the photo, the phone may automatically change many aspects of the photo, e.g., color depth, contrast, sharpness, shadows, reflections, and the appearance of skin. It is very useful for users who do not have time, patience, or experience playing with lights and corrections.
After tapping on the Remaster button, it will take a few seconds, as shown in the screenshot above, for the phone to work out the optimal remastering plan.
Once it is done, you can compare the Before and After, as shown below.
Drag the slider to the left or right to see more area of the original and edited photo.
For example, in this example, the remastering correctly adds more “blue” to the sky. Some details were added in several locations.
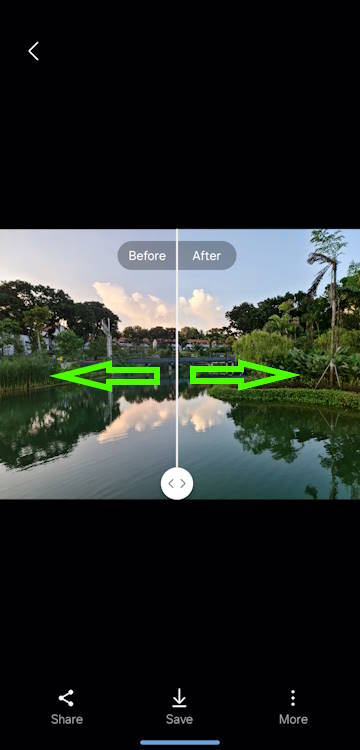
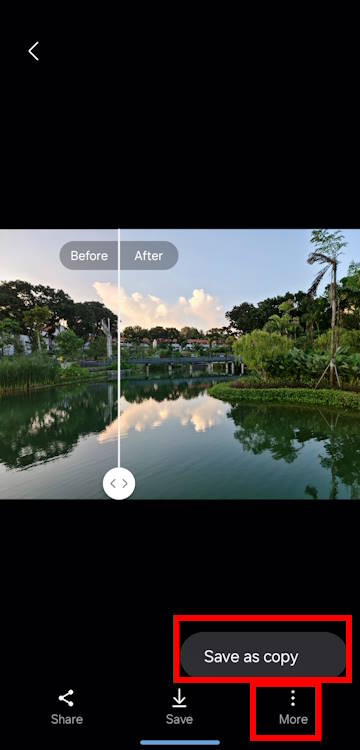
Again, there are no settings or customizations for the remastering, as it is offered by AI as the “best” solution to automatically edit the said photo.
If you feel the edit does improve the photo, you can save it.
When saving the edited photo on Galaxy S23 and other Galaxy devices with Android 13 (One UI 5) or Android 14 (One UI 6), you have two options:
- Overwrite your current photo. You can always revert back (It has been available since One UI 3) as long as the photo is still on the phone. You will see the Revert button when you open the photo in the Photo Editor.
- Save as a copy. You have two individual (and different)copies of the two photos. The original copy will not be changed. The saved copy will not have the Revert button when you open it in the Photo Editor.
3. Object eraser
Another tool offered in the One-tap editing is the object eraser (which was introduced in One UI 5.1). It is more complicated than the Image Clipper.
As suggested by the name, you can use the object eraser to remove unwanted objects. The phone will use some AI algorithms to fill the deleted space so that the photo still looks natural and genuine. This is similar to the Magic Eraser in Google Pixel phones or Google Photos.
For example, for the same picture used earlier, you want to remove the tree in the foreground.
After tapping the object eraser button, you can use your finger or S Pen (for S23 Ultra) to draw around the object to be removed, as shown in the screenshot below.
Once you close your drawing, it will be highlighted. You can then tap the Erase button to remove the object.
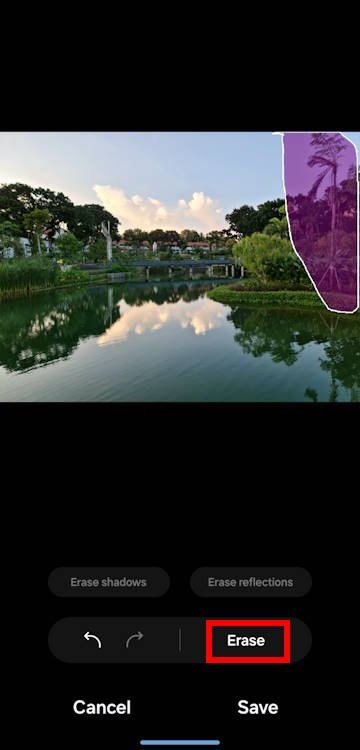
As shown above, you can find the tree was removed. The removed area was filled with some AI-generated objects that seamlessly mixed with the surroundings.
However, the reflection of the tree immediately tells you the photo is not genuine. The object eraser only fixes the removed area and does not remove objects beyond the drawing area.
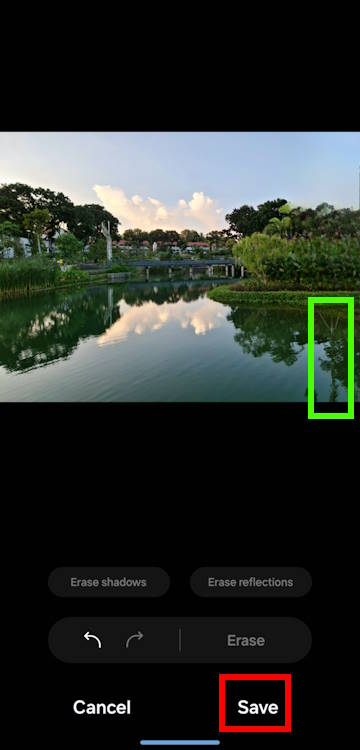
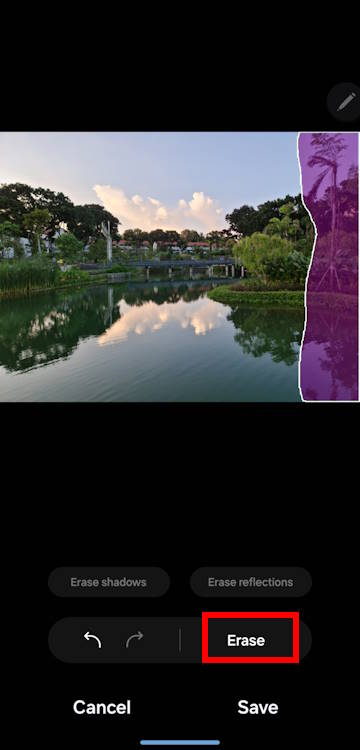
To make it a bit more realistic, you can select the tree and its reflection, as shown below. Then tap Erase.
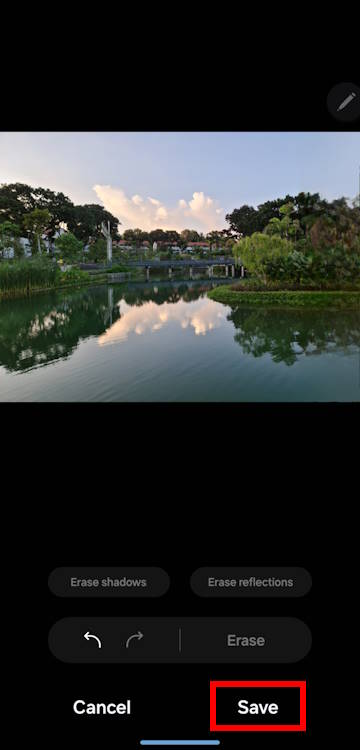
As shown above, the picture looks more genuine. Of course, you can refine your selection and get better results.
4. Portrait
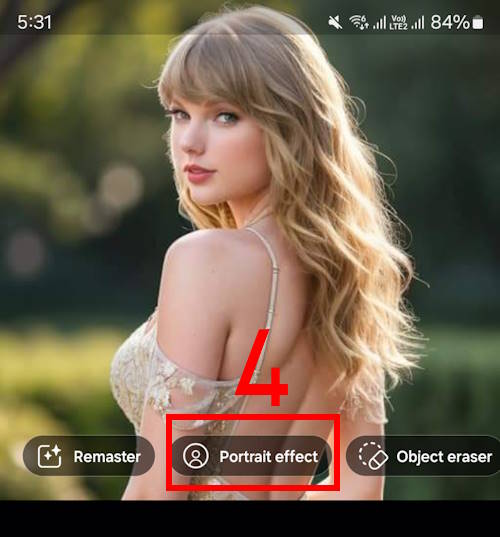
One-tap editing can also turn your photos into Portraits when the human face is the main object in the foreground.
For example, if you swipe up to view the details of such a photo, you will see the Portrait Effect option, as shown in the screenshot below.
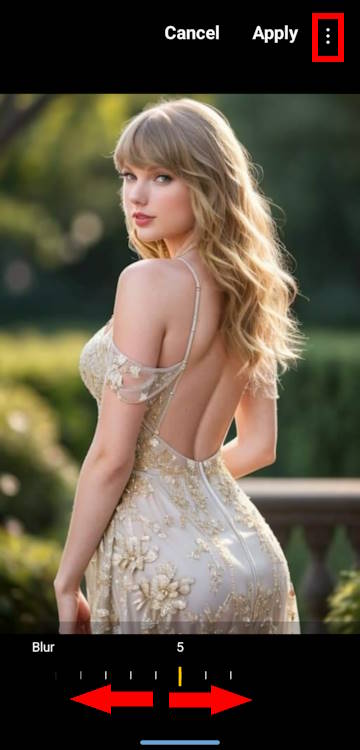
You will then have the option to adjust the blur for the background, as shown below.
A slider is available for you to adjust the level from 1 to 7.
If you are happy with the result, tap Apply to save (and overwrite) the photo. You can always roll back in the future if you want.
Of course, if you want to save the edit as a separate photo, you can tap the menu key (3 vertical dots), as shown below.
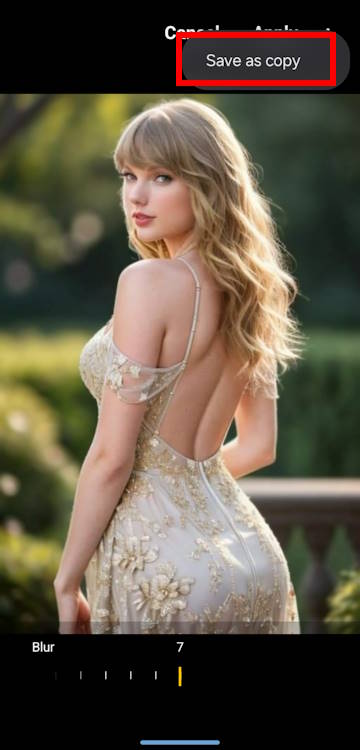
Then tap Save as copy to save the edited photo as a new one. The original one will not be changed.
Please note the photo can be taken in any camera mode. It is not limited to photos taken in portrait mode.
Do you have questions about using One-Tap Editing in the Android 14 (One UI 6) update?
If you need help with using the One-Tap Editing in the Android 14 (One UI 6) update on Galaxy S23, S22, S21, or other Galaxy devices, please let us know in the comment box below.
The community will help you.
![Spigen Thin Fit Designed for Galaxy S23 Ultra Case (2023) [Military-Grade Protection] - Black](https://m.media-amazon.com/images/I/41i1xrzj2oL._SL160_.jpg)


![SAMSUNG Galaxy Buds2 Pro True Wireless Bluetooth Earbuds, Graphite, Hi-Fi Sound, 360 Audio, Active Noise Cancelling, Comfort Fit, HD Voice, IPX7 Water Resistant [US Version, 1Yr Manufacturer Warranty]](https://m.media-amazon.com/images/I/21Y3xVnL0BL._SL160_.jpg)
You may check other Galaxy S23 guides organized in the following 4 sections.
- Galaxy S23 new features guides. Galaxy S23 new features guides explain the new features of Galaxy S23 and show you how to use them. New features in the One UI 6 (Android 14) update are also covered in this section.
- Galaxy S23 how-to guides. Galaxy S23 how-to guides show you how to use and customize Galaxy S23, S23+, and S23 Ultra to meet your needs.
- Galaxy S23 camera guides. Galaxy S23 camera guides show you how to use Galaxy S23 camera features to shoot the best photos and videos with the top-notch camera system in Galaxy S23, S23+, and S23 Ultra. The new camera features in the One UI 6 (Android 14) update are also covered.
- Galaxy S23 accessories guides. Galaxy S23 accessories guides explore useful Galaxy S23 accessories and show you how to use them to protect your phone or increase your productivity (or fun).
Besides, you can read and download (in PDF format) the official Galaxy S23 user manual (including the updated Galaxy S23 user manual for Android 14 (One UI 6).
In addition to the comment box below, you can also reach us through the following channels:
Do not forget to subscribe to our newsletter to get the latest Tips and tricks on Galaxy S23.
Subscribe to our newsletter!
Enjoy your Galaxy S23!
