• Skip to primary navigation
  • Skip to main content
  • Skip to primary sidebar

Galaxy S10 Guides

a owners-help-owners community of Samsung Galaxy S10, S10+ and S10e

  • Home
    • About Galaxy S10 Guides
    • Contact Us
  • New Features
    • Top 10 new features in Android 10 update for Galaxy S10
    • Top 5 new features added in Galaxy S10 September Update
    • Top 10 new features of Galaxy S10
    • Top 10 disappointing or missing features of Galaxy S10
    • How to use the new fingerprint reader to unlock Galaxy S10, Note 10, S20, Note 20, S21, and S22?
    • How to use Galaxy S10 wireless PowerShare to charge other devices?
    • How to use Galaxy S10 home screen landscape mode for Home screen and lock screen?
    • Specifications of Samsung Galaxy S10, S10 Plus, S10e, and S10 5G
    • How to use Galaxy S10 camera night mode?
    • How to use Galaxy S10 night mode?
  • How-to Guides
    • Top 10 new features in Android 10 update for Galaxy S10
      • Top 5 new features added in Galaxy S10 September Update
    • How to charge Galaxy S10 battery?
      • How to use Galaxy S10 wireless PowerShare to charge other devices?
      • Galaxy S10 wireless charging guide
    • Galaxy S10 SIM card guide
      • How to use two SIM cards on Galaxy S10, S10+, S10e, S20, S20+, and S20 Ultra?
    • Meaning of Galaxy S10 status icons and notification icons
      • How to disable or customize the notification icons in the Galaxy S10 status bar?
      • How to enable and use Galaxy S10 developer options?
    • How to use Galaxy S10 Settings?
      • How to use Galaxy S10 quick setting buttons?
      • How to use Galaxy S10 screen zoom?
      • How to use Galaxy S10 edge screen?
      • How to use Galaxy S10 night mode?
      • How to move apps to the micro SD card to free phone storage on Galaxy S10 ?
    • How to take screenshots on Galaxy S10 without using any apps?
    • How to use and customize Galaxy S10 lock screen?
      • How to use Galaxy S10 home screen landscape mode for Home screen and lock screen?
      • How to Use Galaxy S10 Always On Display (AOD)?
    • Galaxy S10 layout (layout of Galaxy S10, S10 Plus, and S10e)
      • How to use Galaxy S10 touchscreen gestures on Galaxy S10, S10+, and S10e?
      • How to use the new fingerprint reader to unlock Galaxy S10, Note 10, S20, Note 20, S21, and S22?
      • How to power on, power off, and reboot Galaxy S10 even when the phone hangs?
    • Understand Galaxy S10 Home Screen
      • How to use Galaxy S10 navigation buttons and navigation gestures?
      • How to hide Bixby Home from Galaxy S10 Home Screen?
      • How to use Galaxy S10 virtual bezel to hide the front camera cutout without using any apps?
      • How to use Galaxy S10 home screen edit mode?
      • How to use Galaxy S10 Apps screen?
      • How to use app folders on Galaxy S10 Home screen and Apps screen?
    • Unbox Galaxy S10: understand Galaxy S10 box contents
      • How to use Samsung Smart Switch to migrate to Galaxy S10?
      • How to hide suggested apps on Galaxy S10? and how to stop Finder uploading your data to Samsung servers?
    • Galaxy S10 camera settings explained
      • How to set photo size on Galaxy S10, S10e, S10 5G, and S10+?
      • How to avoid mirrored photos with Galaxy S10 front camera?
      • How to use Galaxy S10 camera night mode?
  • Camera Guide
    • How to use Galaxy S10 Camera app?
    • Galaxy S10 camera settings explained
    • How to set photo size on Galaxy S10, S10e, S10 5G, and S10+?
    • How to use Galaxy S10 camera night mode?
    • How to avoid mirrored photos with Galaxy S10 front camera?
    • How to use 5 shooting methods for Galaxy S10 camera?
  • User Manual
  • Accessories Guide
    • How To Use Galaxy S10 LED View Cover (Galaxy S10 LED Wallet Cover)?
    • How to use Galaxy S10 LED cover (Galaxy S10 LED back cover)?
    • How to use Galaxy S10 clear view cover (S-View flip cover)?
    • Galaxy S10 wireless charging guide

take screenshots on Galaxy S10

Top 10 new features in Android 10 update for Galaxy S10

simon · 1 Comment

Top 10 new features in Android 10 update for Galaxy S10Samsung started to roll out the Android 10 update for Galaxy S10 in December 2019. The update is expected to reach almost all Galaxy S10 (S10, S10+, S10e, and S10 5G) by Q1 2020.

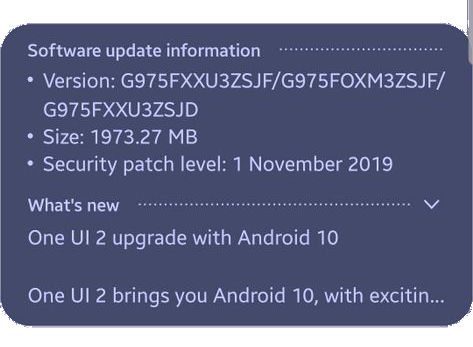
In most regions, the Andriod 10 update should be available by January 2020.

Android 10 update for Galaxy S10 is the first major update for the device. Some Galaxy Note 10 new features were ported to Galaxy S10 in the September 2019 update as explained in this post. But in some regions, this feature update is combined with the Android 10 update.

Of course, Galaxy S10 (all 4 variants) will get the new version of Android (Android 10). In addition to the underhood improvements in performance, security, and privacy, most of the Android 10 features are available in Galaxy S10 now.

This Galaxy S10 guide explains the top 10 new features you should try in the Android 10 update for Galaxy S10: native screen recorder, Android 10 navigation gesture, more info in Device Care, tweaked camera UI, enhanced biometrics, power limit for Wireless PowerShare, improved one-handed mode, OneDrive integration in the Gallery app, dark mode, and One UI 2.0.

Native screen recorder

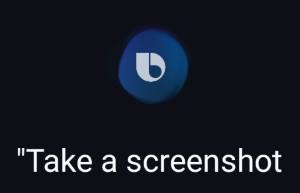
In addition to streaming your screen (e.g., play games), screen recording (not just screenshot) is very useful for technical support and sharing the procedural info.

Samsung first introduced the native screen recorder in Galaxy Note 10. Now in Android 10 update for Galaxy S10, all S10 phones (including S10e, S10, S10+, and S10 5G) have this nice feature.

Compared to the screen recorder on Galaxy Note 10, Samsung apparently polished the app a bit in Galaxy S10 so that you get more controls.

Android 10 navigation gesture (full-screen gestures)

Google introduced navigation gestures in Android Pie with a Home button and an Overview button. In Android 10, the navigation gestures can be used without any buttons (aka, full-screen gestures).

In the Android 10 update for Galaxy S10, the new Android 10 navigation gestures were added.

Of course, you can still use Samsung’s navigation features introduced in Android Pie (Android 9).

If you are not a fan of either of the navigation gesture implantations, you can use the traditional navigation buttons.

Anyway, the Android 10 navigation gesture is just an additional option.

You may check this guide on how to use navigation gestures on Galaxy S1o after the Android 10 update.

More info from Device Care

Device Care now offers more information in most cards.

For example, in the battery usage card, you can get more detailed information about battery usage and estimation.

Tweaked Camera UI

Samsung is still not sure how a good camera UI should be. So, they change the camera app UI in almost every update.

In the Android 10 update, the change is not significant.  The tweaks include:

  • You can edit the camera modes at the bottom of the screen (instead of navigation to Galaxy S10 camera settings).
  • You can tap the new
… Read the rest

Filed Under: S10 how-to guides, S10 new features Tagged With: Android 10, Android 10 update, Android Pie, dark mode, face recognition, fingerprint scanner, Galaxy S10, Galaxy S10 5G, Galaxy S10 Camera app, Galaxy S10 camera modes, Galaxy S10 camera settings, Galaxy S10 device care, Galaxy S10 navigation gestures, Galaxy S10 night mode, Galaxy S10 settings, native screen recorder, navigation button, One UI, One UI 2.0, screenshot, take screenshots on Galaxy S10, wireless PowerShare

How to power on, power off, and reboot Galaxy S10 even when the phone hangs?

simon · 10 Comments

power on, power off, and reboot Galaxy S10 even when the phone hangsWhen Galaxy S10 hangs, you can hold the Power button AND the volume down button for more than 7 seconds to reboot the phone forcefully.

There are a few other combinations of keys (buttons) that you may need to know to power off, power on, reboot, reboot into recovery mode, or reboot into download mode on Galaxy S10, S10+, S10e, and S10 5G.

This Galaxy S10 how-to guide explains how to reboot Galaxy S10 when the phone hangs, and other key combinations for powering on, powering off and rebooting Galaxy S10 (including all 4 Galaxy S10 models).

How to reboot Galaxy S10 when the phone hangs?

Although it happens rarely, Galaxy S10 may hang (not responsive), just like other electronic devices or other Android phones.

If this happens to your Galaxy S10, you may also find the phone does not respond to the power button as well.

Up to Galaxy S5, Samsung used a removable battery in their phones and you can remove the battery to force a reboot.

But since Galaxy S6, Samsung has switched to non-removable batteries. And therefore, the battery removing method is not working for Galaxy S10.

So, when Galaxy S10 hangs (even not responsive to the power button), you can hold the Power button and the volume down button (2 buttons), as shown below, for more than 7 seconds to reboot the phone forcefully. You may check the Galaxy S10 layout to locate the buttons.

reboot Galaxy S10 when the phone hangs

Technically, holding these two buttons is equivalent to removing (and putting back) the battery.

Using the power button and power button menu on Galaxy S10

Normally, you can press the power button on Galaxy S10 to:

  • Power on the phone (when the phone is off).
  • Wake up the screen (when the screen is off).
  • Turn off the screen and lock the phone. (when the screen is on)
  • Take photos in the camera app (if you enable it).
  • End a call (if you enable it).

If you quickly press the power button twice, you can launch the camera app. This is called Galaxy S10 camera quick launch.

You can also call out the power button options (power button menu)  as shown below by long-press the power button for about 2 seconds.

In Galaxy S10 power button menu, there is no shortcut for the screenshot. This is different from the stock Android Pie. If you need to take screenshots, you may check this guide.

Please note, normally, you need to use the Power off button in the power button menu to power off Galaxy S10.

The Reboot button allows you to reboot Galaxy S10 gracefully. Reboot Galaxy S10 gracefully will not lose any data. But if you reboot Galaxy S10 forcefully, all unsaved data will be lost.

If you hold the power button for more than 5 seconds, Galaxy S10 will reboot.

How to reboot Galaxy S1o into recovery mode?

Occasionally, you need to reboot Galaxy S10 into the recovery mode, for example, to clear … Read the rest

Filed Under: S10 how-to guides Tagged With: Galaxy S10 camera quick launch, Galaxy S10 layout, Galaxy S10 lock screen, power button options, power key, Power off Galaxy S10, power on Galaxy S10, reboot Galaxy S10, reboot into Galaxy S10 download mode, reboot into Galaxy S10 recovery mode, take screenshots on Galaxy S10

How to use Galaxy S10 edge screen?

simon · Leave a Comment

Samsung Galaxy S10 edge screen allows you to access some features and apps quickly from the curved the display without navigating to the home screen or apps screen.

Since the inception of the curved-screen in Galaxy Note Edge, Samsung tried hard to develop some killing features for the curved screen.

This Galaxy S10 how-to guide explains everything you need to know about Galaxy S10 edge screen.: what is edge screen, how to access and use edge screen, edge lighting, edge panels, and Apps edge.

What is Galaxy S10 edge screen?

Samsung introduced the edge screen feature since Galaxy Note Edge (Note 4 Edge). But edge screen on Galaxy Note Edge is a separate display area to the right side of the main screen.

Since Galaxy S6 Edge, edge screen has been no longer a separate part. It refers to a part of the main screen linked to the curved edges of the display.

So, Galaxy S10 edge screen is not a separate screen. Instead, it is just part of the display close to the curved edges on both sides of Galaxy S10, S10+ and S10 5G as illustrated in Galaxy S10 layout.

Because Samsung started to reduce the curved part of the screen from Galaxy S8, many new Galaxy S8, S9, Note 8, Note 9 and S10 owners may even not realized the curved edges and the special features associated with them.

Galaxy S10 edge screen includes two fundamental features:

  1. Edge lighting. You can use edge lighting the light up the edges of the screen when notifications arrive.
  2. Edge panels. You can put frequently used apps and some special tools in the panels so that you can access them quickly.

If you disable both edge lighting and edge panels, Galaxy S10 edge screen will be disabled automatically. This is the only way to disable Galaxy S10 edge screen features.

Galaxy S10 edge screen works on all screens (except AOD)and apps when in portrait mode. You can use it on the home screen, lock screen, apps screen, and when using any apps.

When you use edge screen on the lock screen, some features will not work until the phone is unlocked. This is a security feature, not a bug.

If your home screen or lock screen is in landscape mode, or you are using an app in landscape mode, edge panel handle will disappear automatically. In other words, Galaxy S10 edge screen does NOT work in landscape mode.

How to access the edge screen?

You can access the Galaxy S10 edge screen by dragging the edge panel handle to the center of the screen, as shown below.

The edge panel handle appears on the right side by default. You can customize it so that it can appear on either left or right sides. You can also choose a color for it (read on).

The touchscreen gesture is dragging. But the swipe gesture works as well.

How to customize the Galaxy S10

… Read the rest

Filed Under: S10 how-to guides Tagged With: app folder, App pair, apps edge, edge lighting, edge panels, Galaxy S10 edge screen, Galaxy S10 home screen, Galaxy S10 home screen landscape mode, Galaxy S10 layout, Galaxy S10 Multi Window, Galaxy S10 settings, landscape mode, notifications, people edge, split-screen view, take screenshots on Galaxy S10, tasks edge, touchscreen gestures

How to use Galaxy S10 home screen edit mode?

simon · Leave a Comment

Galaxy S10 Home screen edit mode allows you to customize the home screen with themes, widgets, screen panels, wallpapers.

Although some customizations and options can be accessed from Galaxy S10 settings or quick settings, a few features can only be accessed from the Galaxy S10 home screen edit mode.

This Galaxy S10 how-to guide explains when you need to use Galaxy S10 home screen edit mode, what you can do in the edit mode, and how to access and use Galaxy S10 home screen edit mode.

What is Galaxy S10 home screen edit mode?

It is impossible to stuff all customizations and settings into Galaxy S10 Settings. Also, some customizations for Galaxy S10 can be done quickly on the screen with simple gestures.

So, Samsung used the home screen edit mode for you to quickly customize the home screen without navigation through the Settings or other pages.

In a nutshell, the home screen edit mode is a special mode of the home screen. In this mode, you can customize many aspects of the Galaxy S10 Home screen.

And some settings/customizations for Galaxy S10 Home screen can only be done through this mode. For example, assigning a home screen panel as the “Home” of Home screen panels/pages, or remove the Bixby Home from Galaxy S10 Home screen, or adding widgets to the home screen, all can only be done in the Galaxy S10 Home screen edit mode.

Of course, some features in the edit mode can also be accessed from Galaxy S10 Settings (for example, adjust Galaxy S10 home screen settings), or standalone apps/app shortcuts (e.g., use themes and wallpapers).

How to access the Galaxy S10 home screen edit mode?

You can only use touchscreen gestures to access the home screen edit mode.

There are two gestures for you to access the edit mode for the Home screen:

  1. Tap and hold (long tap) any blank area on the Galaxy S10 Home screen.
  2. Pinch on the Galaxy S10 home screen.

These are the two only methods to enter the S10 home screen edit mode.

When you use the first gesture (long tap), you need to make sure you are tapping the empty (blank) area except for the status bar and navigation bar.

You can tap anywhere above home screen panel indicator (see below) or tap the back button to exit the edit mode and return to the Home screen.

What are the features of Galaxy S10 home screen edit mode?

As shown in the screenshot below, you can find the following common features and functions in the edit mode of  S10 Home screen:

  1. Assign the panel/page as the home of the Galaxy S10 Home screen. If you keep tapping the Home button, you should return to the “Home” of the home screen. You must have one and only one panel/page as the home of the home screen panels.
  2. Delete the page.  If this is the “home” panel and you delete it, the
… Read the rest

Filed Under: S10 how-to guides Tagged With: Bixby Home, Galaxy S10 always-on display (AOD), Galaxy S10 home screen, Galaxy S10 Home screen edit mode, Galaxy S10 home screen landscape mode, Galaxy S10 settings, Galaxy S10 themes, Galaxy themes, hide Bixby Home, landscape mode, long tap, navigation button, pinch, take screenshots on Galaxy S10, touchscreen gestures, wallpapers

How to Use Galaxy S10 Always On Display (AOD)?

simon · Leave a Comment

You can use Galaxy S10 always-on display (AOD) to check notifications, the time, next alarm, today’s schedule, and the weather,  and to control music play without waking up the phone.

On Galaxy S10, Samsung added a few new features for the always-on display and the default behavior. So, do NOT assume the AOD on Galaxy S10 is identical to that on older phones like S9.

This Galaxy S10 how-to guide explains the new features of the Galaxy S10 always-on display (AOD), the difference between Galaxy S10 lock screen and AOD screen, how to enable and customize the always-on display screen on Galaxy S10.

Please note, the always-on display is identical among all Galaxy S10 phones.  In this guide,  Galaxy S10 refers to Galaxy S10e, S10, S10+, and S10 5G,

What is new in Galaxy S10 Always On Display (AOD)?

In all previous Galaxy phones, the always-on display screen will not be turned off automatically unless it is turned on by the scheduler.

So, once you turn on the always-on display on these devices, you have to choose to show the AOD screen all the time when the phone is locked or to show the AOD screen based on your designated period.

On Galaxy S10, Samsung added the show mode for the always-on display screen: tap to show. And this is the default option.

So, after enabling Galaxy S10 always-on display, by default, the AOD screen will NOT show up after you lock the phone unless you tap the screen (once).

The AOD screen will display only about 10 seconds, and then the screen is off.

If you need to show Galaxy S10 AOD screen all the time, you need to change the show mode.

This new show mode is also available on Android Pie update for Galaxy S9, S8, Note 9 and Note 8.

Please note, if you tap Galaxy S10 screen twice when the screen is off, you will wake the screen and get the Galaxy S10 lock screen, instead of the always-on display screen.

Of course, you can disable this feature in Settings —Advanced features —Motions and gestures — Double tap to wake.

Other new features of Galaxy S10 Always on Display include:

  • Landscape mode for Galaxy S10 AOD screen.
  • Brightness adjustment for the AOD screen.
  • Quick settings for AOD.

AOD Quick settings can also be found on Galaxy S9, S8, Note 8 and Note 9 if you updated these phones to Android Pie.

What is the difference between the lock screen and the always-on display screen?

Although Galaxy S10 always-on display screen is part of the Galaxy S10 lock screen and shares the identical FaceWidgets, they serve different purposes.

The major differences between the AOD screen and lock screen include:

  • Galaxy S10 lock screen shows up when the phone wakes up and is in the locked state. While Galaxy S10 AOD screen shows up only when the phone is NOT waking up.
  • You can use app shortcuts in
… Read the rest

Filed Under: S10 how-to guides, S10 new features Tagged With: AOD, AOD themes, charge Galaxy S10 battery, FaceWidgets, fingerprint scanner, Galaxy S10 always-on display (AOD), Galaxy S10 clear view cover, Galaxy S10 home screen, Galaxy S10 Home screen edit mode, Galaxy S10 lock screen, Galaxy S10 notification icons, Galaxy S10 quick setting buttons, Galaxy S10 settings, Galaxy themes, landscape mode, take screenshots on Galaxy S10, touchscreen gestures

How to use Galaxy S10 home screen landscape mode for Home screen and lock screen?

simon · 2 Comments

You can use Galaxy S10 home screen landscape mode for the Home screen and lock screen on Galaxy S10, S10+, S10e, and S10 5G now.

When you hold the phone in the landscape orientation, both Galaxy S10 lock screen and Home screen can rotate so that you can use the landscape mode easily.

This Galaxy S10 how-to guide explains how to control the Galaxy S10 screen rotation, how to enable and use Galaxy S10 home screen landscape mode and Galaxy S10 lock screen landscape mode.

Different ways to control Galaxy S10 screen rotation (orientation)

On Galaxy S9 and S9+, Samsung introduced landscape mode for the home screen as explained in this guide.

Galaxy S10 keeps this feature and therefore you can enable the landscape mode for Galaxy S10 Home screen (including the apps screen)in a similar way.

Even better, Samsung also added the landscape mode for Galaxy S10 lock screen on all Galaxy S10 phones. Currently, this is a Galaxy S10 exclusive feature.  So, the landscape mode for the lock screen is only available on Galaxy S10 phones.

On Galaxy S10, you can control the screen rotation in different ways:

  • You can turn on Auto-rotate so that the apps can change the orientation automatically when you rotate the phone.  When Auto-rotate is on, you can exclude the Galaxy S10 Home screen and Lock screen.
  • You can turn off Auto-rotate (portrait mode) so that the rotation toggle appears when you rotate the screen. So, you can change and lock the screen orientation when you want. You may check this guide on how to use the screen orientation toggle here. When Auto-rotate is off, the rotation toggle will NOT appear on Galaxy S10 lock screen regardless of your lock screen rotation settings.

Please note, some apps may ignore the screen rotation settings. For example, Galaxy S10 camera app will not follow your screen rotation settings. When you rotate the screen, the camera app will always follow your rotation regardless of other settings.

How to enable and use the landscape mode for Galaxy S10 Home screen?

To use the Home screen in the landscape mode, you must enable it first.

You can enable  the landscape mode for the Home screen in two different locations:

  • Galaxy S10 Settings
  • Galaxy S10 Quick settings.

In Galaxy S10 Settings, tap Display.  Then, as shown in the screenshot below,  on the Display settings page, tap Home screen.

Galaxy S10 settings enable rotate to landscape mode

As shown above, in the Home screen settings page, you can enable or disable “Rotate to landscape mode.”

You can also enable or disable Galaxy S10 Home screen landscape mode from Galaxy S10 quick settings.

As shown in the screenshot below, on the Galaxy S10 quick settings panel, tap the text, NOT the button/icon, of Auto Rotate.

If you disabled the auto-rotate, the Auto-rotate text should change to Portrait. In this case, tap the text (not the button) of Portrait.

Please note, the landscape mode for the Home … Read the rest

Filed Under: S10 how-to guides, S10 new features Tagged With: auto rotate, Galaxy S10 home screen, Galaxy S10 home screen landscape mode, Galaxy S10 lock screen, Galaxy S10 lock screen landscape mode, Galaxy S10 quick setting buttons, Galaxy S10 settings, landscape mode, portrait mode, rotation toggle, take screenshots on Galaxy S10, touchscreen gestures

How to use Galaxy S10 Multi Window?

simon · 2 Comments

use Galaxy S10 Multi WindowGalaxy S10 Multi Window allows you to run two apps side-by-side (split-screen view) or to overlap multiple apps over each other and other apps (pop-up view) to improve your productivity on Galaxy s10, S10e, S10+, and S10 5G.

Samsung changed and removed some multi-window features on Galaxy S10 with the updated Recents screen.  Besides, Galaxy S10 Multi Window is significantly from that in the stock Android.

This Galaxy S10 how-to guide explains everything you need to know about Galaxy S10 Multi Window: what is it, the difference between the split-screen view and pop-up view, how to use the split-screen and pop-up views of Galaxy S10 Multi Window.

What is Galaxy S10 Multi Window?

By default, only one Android app can occupy the screen at any time, although Android is based on Linux, which of course supports multitasking on the desktop.

Google first introduced the multi-window (split-screen view) feature in Android Nougat.

But for Samsung Galaxy phones users, Multi Window had been introduced since Galaxy Note II in 2013.

And Samsung continued to polish this feature in each iteration of the Galaxy devices.

Galaxy S10 Multi Window allows you:

  • To run two apps side by side (split-screen view).
  • To let one or more apps floating over other apps and any screens (pop-up view).  The size of the app window can be adjusted and even minimized. The stock Android does not support this even in the latest Android Pie.

Of course, you can use the split-screen view and pop-up view simultaneously.

What are the Multi Window features removed in Galaxy S10?

Unfortunately, Samsung removed some very useful features from Galaxy S10 Multi Window including:

  • Converting a normal app window to the pop-up view mode with a gesture. The diagonally swiping gesture is not supported on Galaxy S10. You cannot find the settings in Galaxy S10 settings anymore.
  • Directly converting split-screen view to pop-up view.  When two apps are in the split-screen view mode, the only multi-window tool in Galaxy S10 is to resize the window. All other tools and options  (e.g., app pair creation, Snap Window, swap apps) are removed in Galaxy S10 Multi Window.
  • Snap Window.
  • Multi Window (split-screen) icon was removed in the thumbnails in the Recents screen. You have to long tap the app icon in the Recents screen to use Galaxy S10 Multi Window feature.

Please note, these features were also removed in the Android Pie update for Galaxy S9 and S8.

If you still need these features, you need to install Samsung’s Good Lock app.

What are the differences between the split-screen view and pop-up view?

If you migrated to Galaxy S10 from other Android phones, you probably tried the split-screen view in the stock Android.

The most powerful feature of Galaxy S10 Multi Window is the pop-up view.

Basically, the split-screen mode allows you to run two apps side-by-side (in the long side). You can adjust the percentage of the screen for each app. … Read the rest

Filed Under: S10 how-to guides Tagged With: Android Pie, App pair, Galaxy S10 Apps screen, Galaxy S10 edge screen, Galaxy S10 home screen, Galaxy S10 Multi Window, Galaxy S10 multiwindow, Galaxy S10 navigation gestures, Galaxy S10 settings, long tap, multi-window, navigation button, One UI, pop-up view, Recents button, Recents screen, Samsung DeX, split-screen view, swipe, take screenshots on Galaxy S10, touchscreen gestures

How to take screenshots on Galaxy S10 without using any apps?

simon · Leave a Comment

take screenshots on Galaxy S10 without using any appsYou can use at least 5 methods to take screenshots on Galaxy S10 without using any third-party apps.

Some screenshot-taking methods are unique to Galaxy S10 (and other Galaxy phones). Some are universal among all Android phones.

This Galaxy S10 how-to guide explains and shows the 5 different methods to take screenshots on Galaxy S10, S10e, S10+, and S10 5G.

What are the 5 ways to take screenshots on Galaxy S10?

On Galaxy S10 (all 4 Galaxy S10 variations), without using any third-party apps, you can use the following methods to take screenshots:

  1. Use hardware buttons (volume down + power button).
  2. Swipe your palm (palm swipe).
  3. Use the Assistant menu.
  4. Use Bixby Voice command.
  5. Use Google Assistant.

Please note, although these are different methods to take screenshots on Galaxy S10, the result is identical except Google Assistant (read on).

Method 1: Use hardware buttons (volume down + power button) to take screenshots

On all Android phones, you can take a screenshot by pressing the holding  Power button and Volume down button simultaneously.

This works on Galaxy S10 as well.

As illustrated below, you can simultaneously hold the power button and volume down button to take a screenshot on Galaxy S10. Please check Galaxy S10 layout for the location of physical buttons on S10 (S10e, S10+, and S10 5G).

Once the screenshot is taken, you will hear the click or shutter sound. If the smart capture feature is enabled in Galaxy S10 Settings — Advanced features, you will also see the toolbar on the bottom as well.

In old Samsung phones with a physical Home button, the physical home button was used with the power button to take screenshots. Because since Galaxy S8, Samsung has switched to on-screen (software) home button, you cannot use the Home button (with the Power button) to take screenshots on Galaxy S10.

The critical point of using physical buttons to take screenshots on the Galaxy S10 is to press the two buttons simultaneously.

As a human, we always press one button earlier than the other. It usually is OK to press the power button slightly earlier than pressing the volume down button. The power button accepts both single tap (press) and long tap gesture (for the power button options), and the long tap gesture will be triggered after you hold the button for about 2 seconds. So, as long as you hold the volume down button within 2 seconds (after holding the power button),  you should be able to get the screenshot.

If you press the volume down button first, you will get the volume settings immediately because the volume down button only accepts the single press gesture.

After pressing the two buttons,

  • If you get the power button option, it means you press the power button too early.
  • If you get volume settings, it means you press the volume button too early.
  • If the screen is turned off, it means, you release the power button too early.
… Read the rest

Filed Under: S10 how-to guides Tagged With: Assistant menu, Bixby button, Bixby voice, Galaxy S10 home screen, Galaxy S10 layout, Galaxy S10 settings, Google Assistant, Home button, palm swipe, power button options, screenshot, smart capture, take screenshots on Galaxy S10, touchscreen gestures

Primary Sidebar

RSS Samsung Galaxy S21 Guides

  • Top 12 new features in Android 12 update for Galaxy S21, S20 and S10
  • Android 12 update vs One UI 4.0 vs One UI 4.1: update Galaxy S21, S20 and S10 to Android 12
  • How to set and resize photo size on Samsung Galaxy S21, S20, S10, and S9 without using any third-party apps?
  • How to Customize Galaxy S21 Home Screen?
  • Master Galaxy S21 Lock Screen Settings
  • How to use widgets on Galaxy S21?
  • How to Use and Customize Galaxy S21 Side Key?
  • How to hide Galaxy S21 password and PIN when typing?
  • How to power on, power off, and reboot Galaxy S21,even when the phone hangs?
  • How to use Galaxy S21 quick settings panel?

RSS Galaxy S20 Guides

  • How to Use Enhanced Processing on Galaxy S20 with Android 11 update?
  • How to access, use, and customise widgets on Galaxy S20 lock screen and AOD screen with Android 11 update for Galaxy S20?
  • How to update Galaxy S20 to Android 11?
  • How to use Galaxy S20 lockdown mode?
  • Top 11 new features in Galaxy S20 Android 11 update
  • How to use Galaxy S20 recovery mode?
  • How to use 5 different shooting methods for Galaxy S20 camera?
  • How to use and customize power mode on Galaxy S20?
  • A Complete Guide Of Galaxy S20 Assistant Menu
  • How to manage location services on Galaxy S20 to protect your privacy?

RSS Galaxy S9 Guides

  • How to use the updated camera app in Android Pie update for Galaxy S9 and S9 Plus?
  • How to use the night mode on Galaxy S9 and S9+ with Android Pie update?
  • Top 9 new features of Android Pie update for Galaxy S9 and S9+
  • Galaxy S9 Android Pie update guides
  • How to use Multi Window on Galaxy S9 and S9+?

RSS Galaxy S8 Guides

  • How to use the new features in Android Pie update for Galaxy S8 and S8+?
  • How to use app shortcuts in Galaxy S8 Home screen in Android Oreo update for Galaxy S8 and S8+?
  • Use notification dots/notification number badge in Galaxy S8 Android Oreo update
  • How to Install Galaxy S8 Android Oreo Update for Galaxy S8 and S8+?

RSS Galaxy Note Tips & Tricks

  • Top 11 disappointments of Galaxy Note 20 and Galaxy Note 20 Ultra
  • How to use the Dynamic Lock screen on Galaxy Note 10?
  • Galaxy Note 10 LED View Cover Guide and Review
  • Install S Note app and Extension pack on Galaxy Note 10
  • How to Use Galaxy Note 10 Camera App?
  • Galaxy Note 10 SIM Card Guide
  • How to use Samsung DeX for PC with Galaxy Note 10 and Galaxy Note 10+?
  • How to use Galaxy Note 10 Clear View cover (S View cover)?
  • How to charge Galaxy Note 10 battery?

RSS All About Chromecast

  • Site Search
  • What’s new in Chromecast 2018 (3rd gen of Chromecast)?
  • About AllAboutChromecast.com
  • How to play games on Chromecast from mobile devices (Android and iOS)?
  • Chromecast VS Amazon Fire TV stick: which one is for you?

RSS Headphone Guide Pro

  • AirPods Pro 2 New features explained
  • What is Samsung Seamless Codec? 4 things you should know about this new codec
  • How to use widgets to check battery levels and control Galaxy Buds 2, Galaxy Buds Pro, Galaxy Buds Live, Galaxy Buds+, and Galaxy Buds?
  • AirPods 3 vs AirPods Pro: which one should you choose?
  • AirPods 3 vs AirPods 2: Top 8 improvements and new features of AirPods 3

© 2015–2023 · GadgetGuideOnline.com is an online community for Gadget Owners! · Hosted by PTRHosting · Powered by Genesis framework for WordPress

Samsung Galaxy S10 how-to guides, user manuals and tutorials for Samsung Galaxy S10, Galaxy S10+ (S10 Plus) and Galaxy S10e (S10 Lite) owners.

Disclaimer: Samsung, Galaxy, Galaxy S10, Galaxy S10+ (S10 Plus) and Galaxy S10e (S10 Lite)are trademarks of Samsung. Android is a trademark of Google. This website is NOT affiliated with Samsung or Google in any way. All the information provided on this website is provided on an "as is" and "as available" basis and you agree that you use such information entirely at your own risk.