 You need to know the Nest Audio layout and understand the functions of each part if you want to use the device effectively.
This Google Home guide explains the contents in the Nest Audio box, Nest Audio layout and functions of each part to help you get started with the Nest Audio. A few questions you may have on the layout of Nest Audio were answered as well.
As explained in this page, Nest Audio is a successor of Google Home, not a competitor to Google Home. Google acquired the Nest brand and has used it for smart home products.
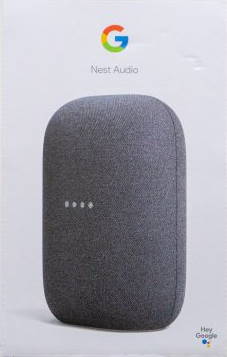
Contents in Nest Audio box
In your Nest Audio box, you can find:
- Nest Audio device.
- Power adaptor with non-detachable cable.
- Documentation bundle.
Nest Audio is the main part, of course. It is far heavier than Google Home.
The power adapter and the jack are proprietary, unfortunately. So, do not lose or damage the cable and adapter. Google is not selling spare ones. There are no third-party power adapters for it yet. In fact, among all Google smart speakers, only the 1st gen Google Home Mini used a 5v/1.8A USB power adapter.
There is a mini-guide inside the box explaining how to set the speaker up.
Nest Audio layout: front view
The design of Nest Audio is substantially different from its predecessor, Google Home, as explained here. It looks more like Google Home Max.
Capacitive touch controls are also different because there is no flat top as in Google Home.
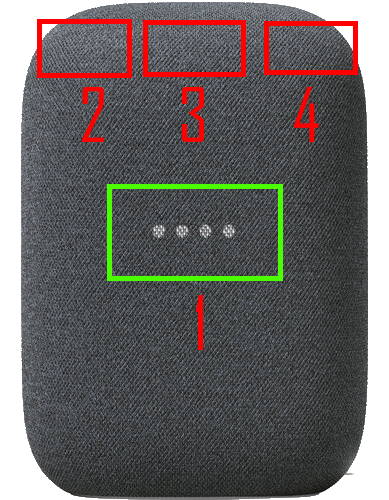
In the front view of the Nest Audio layout, as shown below, you can find:
- LED lights.
- Touch control (left) to lower the volume.
- Touch control (middle).
- Touch control (right) to raise the volume.
When the LED is not light up, you cannot see anything except the fabric-like surface. All LEDs and capacitive controls are hidden behind the surface.
LED lights
The LED lights indicate the status of the Nest Audio by lighting/flashing/pulsing LED lights with different colours.
Of course, identical LED lights may have a different meaning when using Google Assistant or during setup or adjusting volume.
Please check this guide on a complete list of the meaning of Nest Audio LED lights.
Touch control: left
The top part of the front panel accommodates the touch sensors.
You can use the left and right sides to control the volume of Nest Audio.
Tapping the left part would lower the volume. To mute Nest Audio, you need to tap up to 20 times.
Please note, the touch control can only adjust the volume of Nest Audio for media and Google Assistant. If you need to adjust the volume for alarms and timers, you can do it in Google Home apps. You may follow this guide to set up the volume of alarms and timers on Google Nest Audio and other Google Home devices.
Besides, you cannot mute Google Assistant, which will speak in the minimum volume when Nest Audio is muted.
Touch control: middle
You can pause or resume the media using the middle part of the touch control.
Of course, you can also use it to stop ringing or alarms.
If you need to reset Nest Audio, you also need to use this part.
Please refer to this guide on how to use touch controls on Nest Audio.
Touch control: right
You can tap the right side to increase the volume. Again, you may need to tap up to 20 times to reach the maximum volume.
Please refer to this guide on how to control Nest Audio with the touch control panel and voice commands (Google Assistant).
Nest Audio layout: rear view
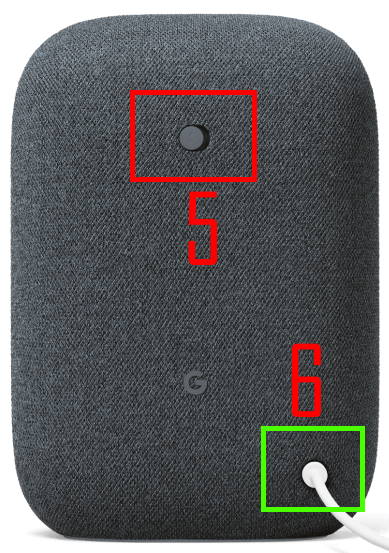
On the back of Google Nest Audio, there are only two items, as illustrated below:
- Microphone switch (mute switch).
- Power jack.
Of course, there is a G logo between them.
Microphone switch (mute switch)
You can mute the microphone on Nest Audio so that it will not respond to chats in the room.
Some owners use this switch for privacy reasons.
Please note, when you mute the microphone, the orange LED will light up reminding you of the status of the microphone. You cannot turn off the muted microphone light. You can only use the night mode to dim it.
You will also need to mute the microphone if you want to factory data reset Nest Audio.
Power jack
Unfortunately, except the 1st Gen of Google Home Mini, all Google Home speakers use the proprietary power adapters and jacks. And the power adapters and jacks are different for each Google Home products.
This means you have to use different power adapters for different Google Home products. Only Google Home Mini uses a standard USB power adapter and a micro USB port.
There is no power button on Nest Audio (just like other Google Home speakers). So, you just connect the power adapter to power on Nest Audio and disconnect it to power off.
Can I use the Google Home power adapter for Nest Audio?
No, you cannot.
First, the power jak on Nest Audio is different from that on Google Home.
Secondly, Google Home power adapter is rated at 16.5V/2A; while Nest Audio power adapter is rated at 24V/1.25A.
Do you have any questions on Nest Audio Layout? Do you know the functions of each part of the Google Nest Audio?
If you have any questions on Nest Audio Layout, please let us know in the comment box below.
The community will help you.
Other Nest Audio guides are listed in this page.
Please check other Google Home guides here.
For Google Home Mini specific guides, please check here.
Leave a Reply